
DIY Kaleidoscope


Norm Barstow, Educational Innovationsby: Norm Barstow

When I was an Elementary Science Coordinator, I used to visit the five schools in my district and each year introduced the Pringles® Kaleidoscope as part of the Sound and Light unit. At that time I used microscope slides, and it became quite a challenge to have the students line up and tape nine slides to make the triangular prism.  Fortunately, Educational Innovations began to carry Kaleidoscope Mirrors (SM-3), thus making the task much easier.

Here is all you will need to build a Pringles® can DIY kaleidoscope in your classroom.

Read the rest of this entry »


Learning About Light


Marty Sagendorfby: Marty Sagendorf

Light is magic stuff: it has no mass, it comes in many colors, it has energy, it can be emitted and absorbed, but it can’t be saved in a bottle or bucket.  Even though we can’t ‘save’ it, we can explore the many ways that light behaves around us.  We are told, or we read, about reflection, refraction, and the many other properties of light’s interaction with objects, but until we actually experience these we really don’t fully appreciate ‘the magic of light’.

Let’s start learning about light!

That’s what this Optics Kit, from Educational Innovations, allows us to do – experience light by doing.  This kit provides the necessary components to perform extensive investigations – ten are completely detailed – and new ideas for experimentation will naturally develop as optics principles become familiar.

Let’s begin with something we see every day:

REFLECTION

Start by drawing a line along, and one-half inch from, the long side of a piece of 8-1/2”x11” white paper.  At the mid-point of this line, draw a perpendicular line extending across the paper.  This line represents a ‘NORMAL’ to the mirror’s surface.

Read the rest of this entry »


Science Corner Investigation: Mirrors


Gordon Goreby: Gordon Gore

Mirror Investigation #1

You Need

2 small, flat plastic mirrors, with suitable vertical supports, 1 piece of plain white paper, letter size

What to Do

1. Hold the mirror vertically. Look into the mirror. Touch your right ear. Watch what the good-looking person in the mirror does. Which ear does he or she seem to touch?

2. Write your first name on a piece of paper. Look at your writing in the mirror. What is ‘unusual’ about what you see? Write your name so that it looks ‘right’ in the mirror.

ambulance3. Notice how AMBULANCE is written.  Why is it always written this way on the front of the emergency vehicle? Read the rest of this entry »

Making Optics Demos Easier


Marty Sagendorfby:  Martin Sagendorf

We’ve all likely encountered the time-consuming effort required to set up an optics demo; all the necessary components are on hand, but they don’t easily work together.  The difficulty is obvious: the various components are either ‘loose’ or mounted at differing heights.  Thus: wasted and frustrating time ‘shimming’ with books and pads to match the heights of the components.

The solution is simple: choose a height (above bench top) and mount every optical component at the same (optical centerline) height.  But, how does one choose a height?  Simple: first, determine the optical component with the highest centerline then second, build supports for all the other components – matching this centerline height.

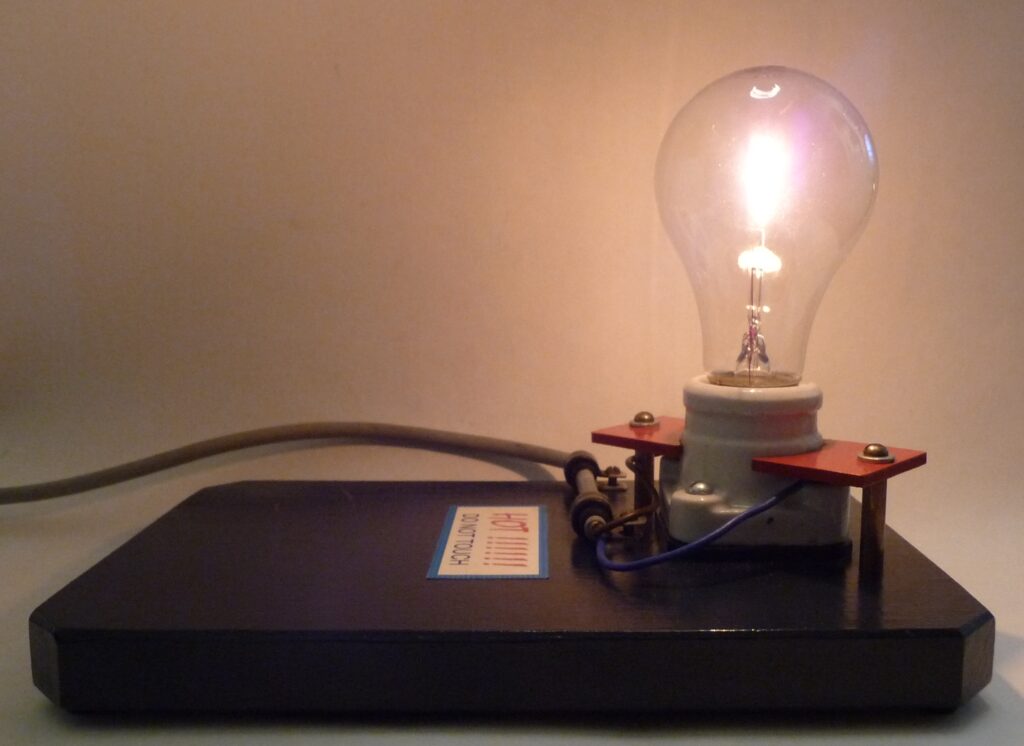
I began with a 100 Watt clear light bulb mounted upon a wooden base – the center of the filament was 4-3/4” above the bench top.  I then ensured that everything else I had, or planned to incorporate in demos, could be centered at this height.

The supports shown in the following illustrations are of ¾” pine – either screwed or glued together.  Where required, various combinations of rubber feet and jackscrews provide support and positioning capability.  When applicable, stacks of steel washers are incorporated to add stability. Read the rest of this entry »