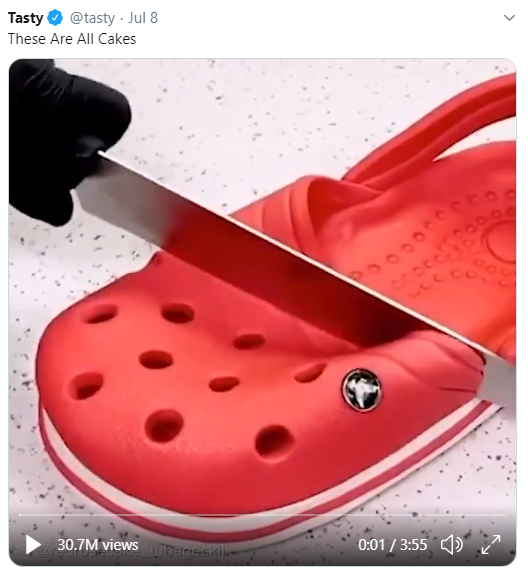
Have you seen the latest viral meme (as of this writing, anyway)? “Everything is Cake” videos are all over the Internet these days. In case you’re in the dark, here’s the story: an award-winning “sugar artist” in Turkey named Tuba Geckil started the trend by posting a video of exquisitely decorated cakes that look exactly like common household items—a potted plant, a pizza, a frothy bar of soap, a stack of fluffy bath towels, and even a roll of toilet paper.
It’s mesmerizing to watch as her knife slices through these creations, revealing the mouth-watering cake inside. You can see for yourself by clicking the image above or visiting here: https://twitter.com/tasty/status/1280966608933003264?s=20. Try Googling @redrosecake_tubageckil. Trust me, you won’t be disappointed. Her Instagram page even has a coronavirus-shaped cake!
Cake = Science?
So what does this have to do with science? Well… plenty. After all, baking is essentially a science experiment that (hopefully) brings forth a delicious result. Think about the ingredients that form the batter… and how, through chemical changes, they are altered to become a solid, fluffy mass. That’s science! To learn more, check out this wonderful primer on baking-as-science written by 10-year-old Nandini here. For a more advanced explanation, consult this FineCooking.com article.
Cake science (or more specifically dessert science) is definitely something I can get behind. Yum. Just think of all the questions you can pose:
What process causes granulated sugar to turn into crispy brown caramel filaments? What’s the deal with beating egg whites into spiky meringues? Why doesn’t parchment paper burn? What makes things cook more quickly when my oven is set to convection? How does a vinegar bath keep bananas from turning brown?
Not all dessert science involves baking. Let’s not forget MY favorite treat, ice cream! Hats off to the genius who figured out that adding salt to ice reduces the temperature of the resulting solution. I was thrilled when I found the Ice Cream Nation website, where they have a handy explanation of the science of ice cream.
Turn your kitchen into a science lab!
As of this writing, we don’t know how many schools will re-open, or what their teaching methods will look like. We hear about blended… modified… hybrid learning. What we also hear is that there is no one-size-fits-all solution.
Which is true.
But cooking is something that we all do (probably more often than we’d like). Why not turn it into an opportunity for learning? Food science is a topic that many students can appreciate even if they’re not interested in the usual scientific fields. It’s fascinating… and very often delicious!
Some kitchen questions to start you off…
Here are some simple questions that you can easily broaden into at-home science experiments. For each one, you’ll need to do some critical thinking to figure out how to discover the answer:
- Does eating hot or spicy food change your body temperature?
- Can chewing mint gum or using mouthwash really chill your mouth?
- Are white teacups more efficient at preventing heat loss than teacups of other colors?
- Will chilling an onion before cutting it keep you from crying?
- Can you explain how the transfer of thermal energy causes popcorn kernels to pop?
- Salt and sugar are two ingredients you’re sure to have on hand. Which of them increases the conductivity of tap water best? What happens if you change the concentration of the solution?
- What happens when you place a metal spoon into a bowl of hot soup? (Hint: heat energy transfer.)
Edible Science!
At Educational Innovations, we’re serious about finding unique ways to spread our love of science. And that includes science you can eat! If you haven’t tried our Astronaut Ice Cream and our assortment of edible bugs, you’re really missing out!
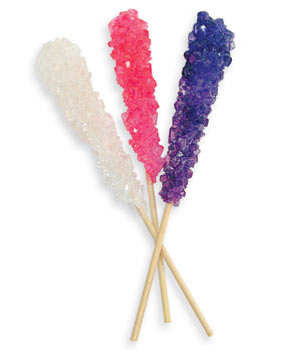
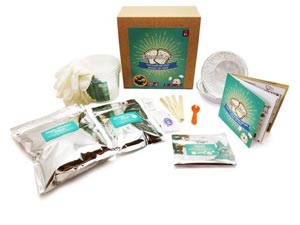
Then there’s our Rock Candy Crystal Growing Experiment Kit – a perfect project for at-home scientists (especially if they have a sweet tooth)!
If baking is your thing, consider our DoughLab. It’s packed with fun, tasty, and educational experiments with yeast, dough and bread.
We have the perfect gift for the person who loves food… and science: Our Science You Can Eat bundle! Bug lollipops, chocolate covered insects, crunchy Crick-ettes and more!
We’d love to hear your ideas for at-home food science projects. Share with us in the Comments section!


 Posted by Donna Giachetti


 by Donna Giachetti