
by Sabrina Smoke
Making bioplastics is a fantastic experiment to try at home or in the classroom. It’s a fun, hands-on way to learn about bioplastic alternatives that are environmentally safer for our planet than traditional plastics. Creating a bioplastic keepsake is likely to inspire further investigations and, in some cases, even future careers for young scientists! Plus, they’re gorgeous!
Some Background on Plastics and Bioplastics
Much of our current packaging comes from petrochemical plastic. This type of plastic is created through a chemical process with fossil fuels to make polymers (long chains of molecules). These plastic polymers take a long time to break down—potentially 1,000 years in a landfill. In our oceans, they can break down very quickly, releasing toxic chemicals such as bisphenol A (BPA). These chemicals can harm animals and humans alike (Barry, 2009).
It’s hard to imagine something taking 1,000 years to biodegrade. In the meantime, all that plastic accumulates in our landfills. Researchers have recently discovered that there are now microplastics (broken down, tiny pieces of plastic) in our water supplies—and even in our fruits and vegetables (Conti et al., 2020).
There are many significant concerns about the impact of plastic on the environment. If you would like to learn more about microplastics, here are some articles to get you started:
Microplastics in Our Oceans and Marine Health
Because starches (e.g. corn, rice, potato, tapioca, cassava, beets, etc.) are widely available natural resources, they have become a common alternative to petrochemical plastics (Laycock & Halley, 2014). Collectively, these alternative plastics are referred to as bioplastics. Over the last 20 years, many inexpensive bioplastic alternatives have been developed and used in common household products such as food packaging, disposable tableware, and compostable bags.
There are many advantages to bioplastics, including the reduction of CO2 emissions. Bioplastics are a cheaper alternative to petrochemical plastics. They are made from renewable resources and create less toxic waste than traditional plastics. They also benefit rural economies that grow different starch-based crops. Plus, there is the potential to reuse them in different ways.
On the downside, bioplastics cannot be recycled with other types of plastics. If they are not disposed of properly, they can release carbon dioxide and methane gas. Making more bioplastics will also require increased production of crops and therefore, the possible use of additional pesticides.
The following may be helpful resources to learn more about plastics, bioplastics, and creative alternatives:
Plastics Explained, from A to Z
The Chemistry of Biodegradable Plastics
This infographic does a nice job of explaining what bioplastics are, how they’re used, and what their impact is on the environment:

Homemade Bioplastics Experiments
If you would like to try making simple bioplastics at home, you can try making starch-based or gelatine-based versions. These two bioplastics have different properties and can be used for various functions. Using bioplastics, you can try making many different things. For instance:
- Key chain decorations
- Holiday ornaments
- Drink coasters
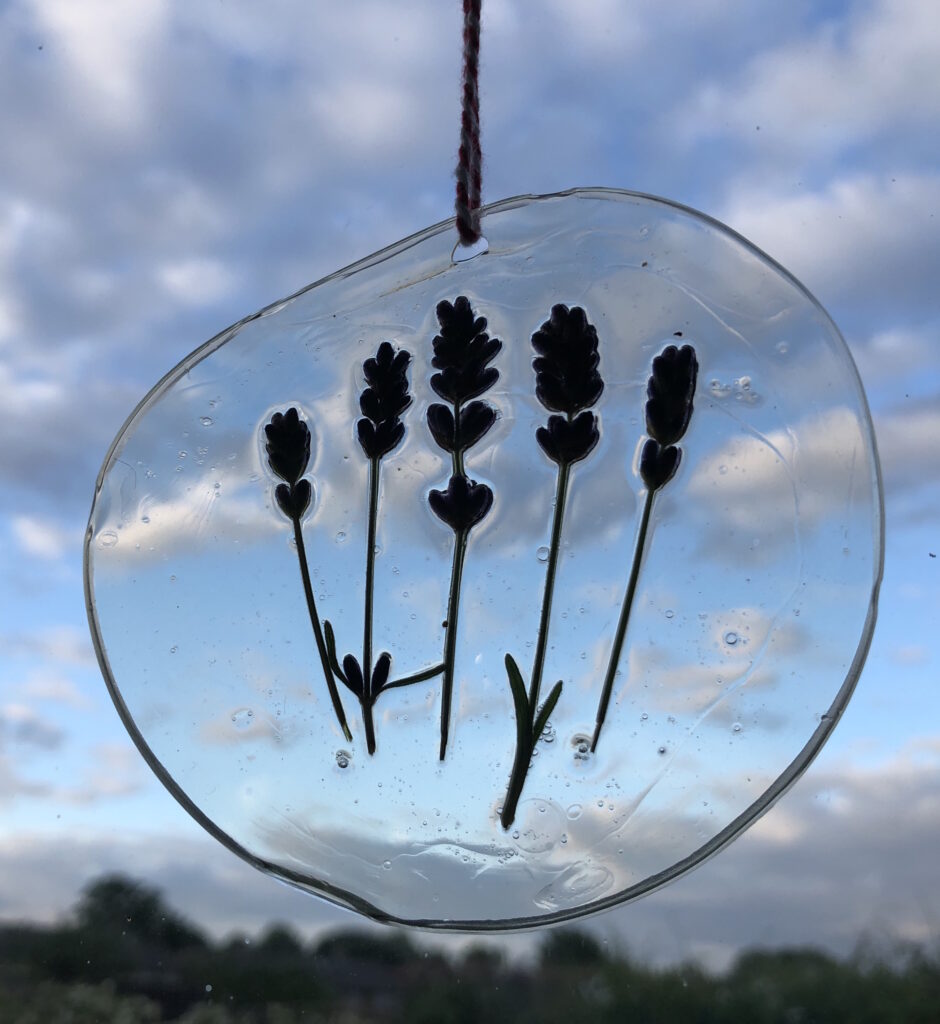
- Suncatchers
- Lantern decorations
- Alternative to saran wrap (ex. Similar to beeswax cloth)
- Magic wands
- Decorative beads / pendants
You may think of even more fun things that you can do with them!
NOTE: These experiments involve handling hot liquids and the use of a stove. I would recommend adult supervision for handling hot materials for children in grades K-8. Students in high school could conduct these experiments independently in a lab setting using a hotplate or Bunsen burner, as well as safety goggles and heat resistant (oven) gloves. If you conduct these experiments in a school setting, please make sure to follow your school’s health and safety procedures. Also, I would recommend trying these recipes out for yourself so you can see exactly how it works before sharing with students.
These recipes will make approximately one item. If students are doing this as a group, they will need to double or triple the recipe depending on the group size.
1. Flexible, Starch-Based Bioplastic Recipe
NOTE: You can double the quantities to make larger batches.
Ingredients and Tools Needed
Pot
Silicone spatula
Silicone mat or plastic food container lid
Stove
Water
Starch – corn starch, tapioca starch or other starch
Glycerine (vegetable glycerin or glycerol can be purchased online, or you can find it in the cake and baking section of the grocery store.)
Distilled white vinegar
Recipe
1 tablespoon of corn starch
4 tablespoons water
1 teaspoon glycerine
1 teaspoon vinegar
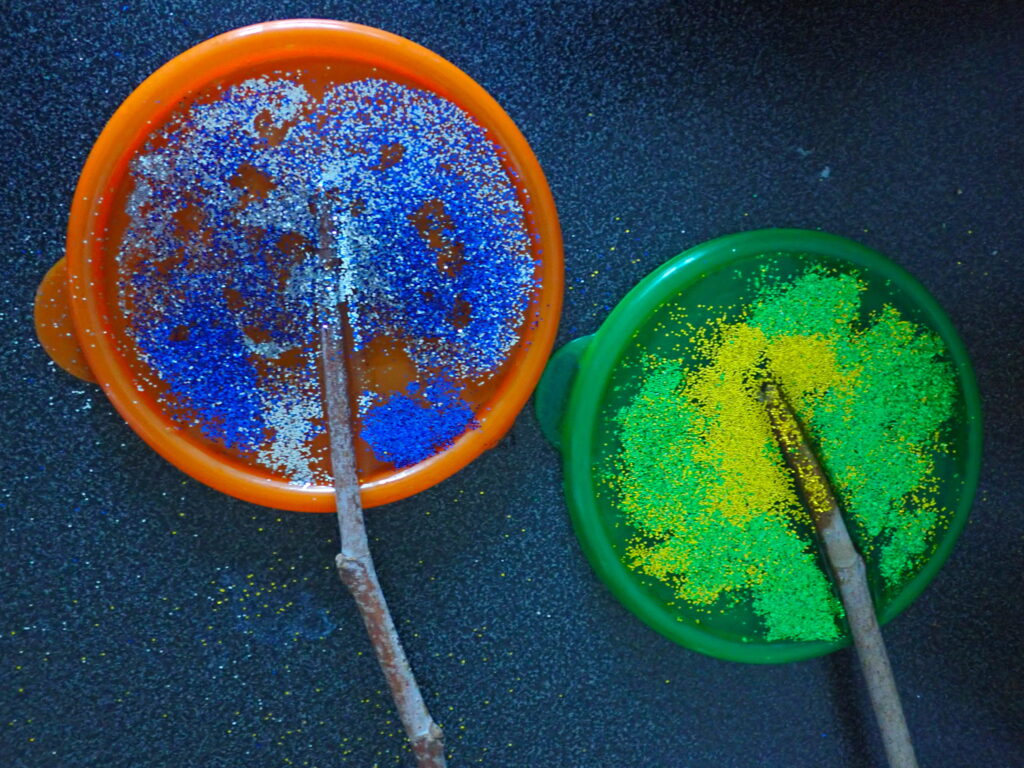
Decorative pieces – glitter, flowers, food coloring, or anything you want to preserve or use to decorate
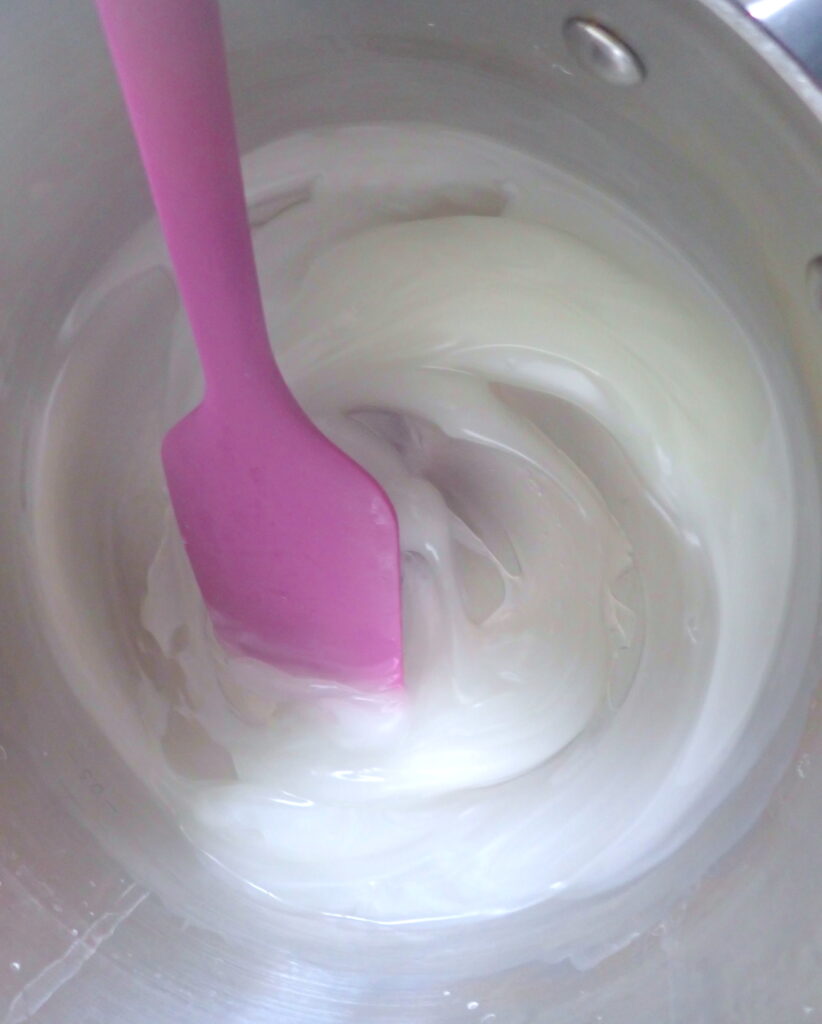
- Step 1: Combine all the ingredients in a pot and mix thoroughly.
- Step 2: Turn the pot on low heat and stir the liquid continuously with a spatula.
- Step 3: Initially, the mixture will be cloudy, but it will eventually become clear and “gooey” and begin to bubble. Turn off the heat and prepare to pour it out.
- Step 4: Pour the mixture onto a silicone mat or large plastic lid. It will probably spread out to a thickness of about ¼ – ½ cm. If you would like to add decorative bits (e.g. glitter, small flower petals), you can do so now.
- Step 5: Leave the mixture to dry out overnight, preferably in warm, dry conditions.
NOTE: If you put in gauze or cloth, you can make it stronger. You could use this to create an alternative saran wrap (e.g. plastic sandwich wrap). I have also heard of people laying cloth with this bioplastic over a mold to create baskets.
*You can put your old starch-based bioplastic in the compost. It’s rich in carbon so will count towards part of the brown material you need.
2. Hard, Gelatine-Based Bioplastic Recipe
Ingredients and Tools Needed
Gelatine powder
Boiling water
Silicone mat or plastic food container lid
Toothpick, skewer or something similar
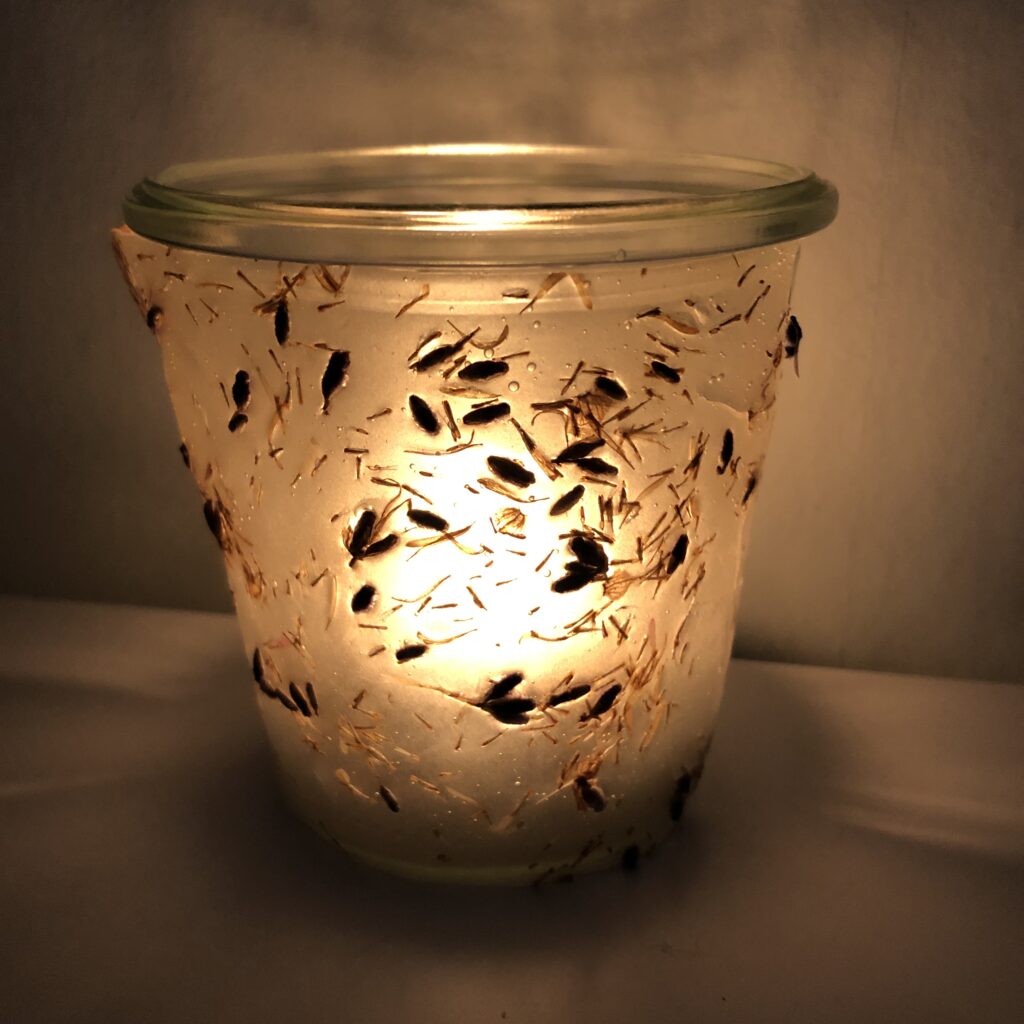
Decorative pieces – glitter, flowers, bugs etc. that you want to preserve or use to decorate
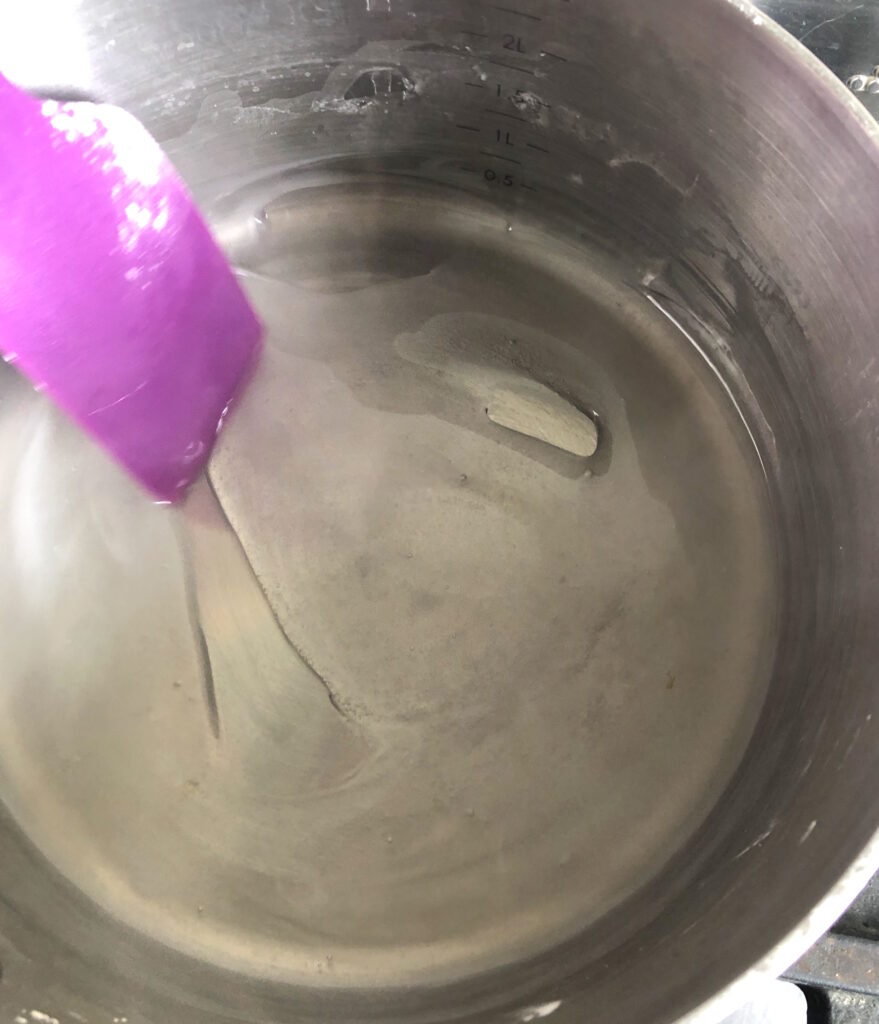
- Step 1: Dissolve gelatine powder in boiling water (ratio of 2:5 – 2 tbsp. gelatine, 5 tbsp. water).
- Step 2: Stir until it fully dissolves. If the gelatine does not completely dissolve, add 1 tsp. of boiling water until fully dissolved.
- Step 3: Pour the liquid onto the plastic lid or silicone mat.
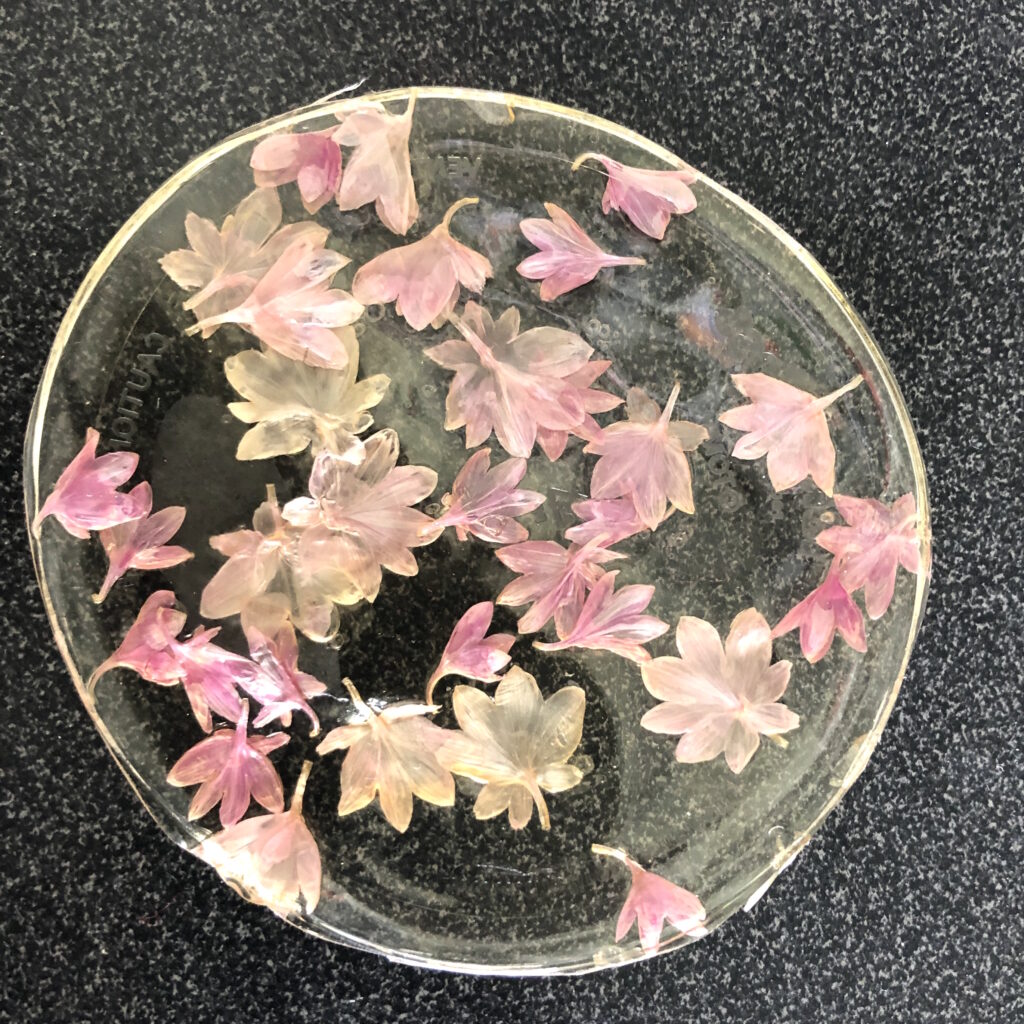
- Step 4: Place your decorative pieces (e.g. flowers, sequins, insects, etc.) into the liquid and use a toothpick or similar implement to arrange the objects, completely submerge them and pop any air bubbles. * Be careful not to make it too thick. If it’s more than about 1 cm, it may become moldy before it can dry out.
- Step 5: When the gelatine has set (I recommend letting it become rubbery overnight), you can cut a hole in it to hang it or cut it into any shape you wish.
- Step 6: Leave it to harden – It will need a warm, dry environment to dry out. It can take 1-4 days to cure completely, depending on the thickness.
Gelatine is a source of nitrogen. To dispose of it, smash it up, pour boiling water over it, and then use it to fertilize your garden after cooling.
Questions
- Do you think you could figure out a way to make bioplastic from something else?
- Can you find an alternative recipe?
- Is there a way to make your bioplastic thicker or stronger?
- How else could this be improved?
- Is there a way to get it to dry faster?
- Can you find other uses for your homemade bioplastics?
- For those who love slime: if you have been able to make starch-based bioplastics, can you find a way to develop a recipe for starch-based slime?
Further Learning
Why not take things further by learning about polymers? Educational Innovations has many wonderful experiments to help your children learn about polymers and other exciting areas of science. You may want to start with the chemistry section where there are fun learning activities such as slime kits and Super Bouncing Ball kits where children can learn more about polymers.
References
Barry, C. (2009). Plastic Breaks Down in Ocean, After All – And Fast. National Geographic. https://www.nationalgeographic.com/news/2009/8/plastic-breaks-down-in-ocean-after-all-and-fast/
Conti, G. O., Ferrante, M., Banni, M., Favara, C., Nicolosi, I., Cristaldi, A., Fiore, M., Zuccarello, P. (2020). Micro- and nano-plastics in edible fruit and vegetables. The first diet risks assessment for the general population. Environmental Research, 187, 1-7. Accessed 29/6/20 https://reader.elsevier.com/reader/sd/pii/S0013935120305703?token=2664EC3E220BA116A52C0D0429C59FCD0301456CCE76B129F8A187DD6BDE25A8C1245690F12F8365D113546C52B3FFCF
Laycock, B.G. & Haylley P.J. (2014). Starch Applications: State of the Market and New Trends. In P.J. Halley and L. Averous (Eds.) Starch Polymers: From Genetic Engineering to Green Applications (ed., pp. 381-419.) Elsevier.
Reddy, R.L., Reddy, V.S., Reddy, & Gupta, A.G. (2013). Study of Bio-plastics as Green & Sustainable Alternative to Plastics. International Journal of Emerging Technology and Advanced Engineering, 3(5) 82-89. https://pdfs.semanticscholar.org/9e8c/b3ddb5499e2f7226926feed35f87addbaad1.pdf
About the author: Sabrina Olizar-Smoke is a graduate of U.C. Berkeley and received a Masters from Washington University in St. Louis. She also has a Post Graduate Certificate in Education from the Institute of Education in London. She is an experienced teacher who has taught primarily in elementary school. She helped her school gain awards in outdoor learning and linked the school’s science curriculum to gardening and outdoor education. Since taking time out from teaching to raise her children, Sabrina has a website, Play of the Wild to support parents and teachers with learning activities, particularly in the outdoors.


Hello i love these recipies do you think making bioplastic could be made out of a candy or chocolate wrapper?
this is awesome! Do you think students could make a mini compost bin with this?
is this real tho? I mean how could the mixture of water and gelatine look that hard? it’s as if they’re resin…
Hey, I Was wondering how you recycle the new made bioplastics
Hey, just one thing, please can we not put glitter and sequins in bioplastic as the purpose is to breakdown when put into compost.
Great instructions and results.