Soil Porosity, Permeability and Retention Experiments


Cynthia Houseby: Cynthia House

Demonstration Materials:

  • 125 ml graduated cylinder or similar item
  • ~100 ml of pea gravel or small marbles
  • kitchen sponge
  • tap  water

Experiment Materials:

  • preforms and racks (three preforms/student or group)
  • fine gravel  such as aquarium gravel (~ 30 ml/student or group)
  • coarse sand* (~ 30 ml/student or group)
  • fine sand* (~ 30 ml/student or group)
  • small plastic cups ~ 100 ml capacity
  • squares of tulle (“bridal illusion”) and organza, ~ 10 cm x 10 cm
  • rubber bands
  • electronic balance (capacity at least 100 gm)
  • one pound margarine tub or similarly sized plastic cup per balance**
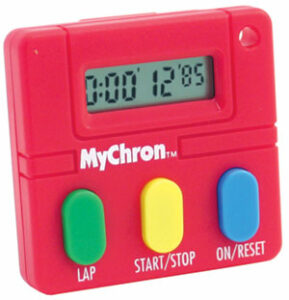
  • stopwatch or count-up timer (MyChron Student Timer)
  • 125 ml graduated cylinder or similar item
  • calculators
  • tap water

MyChron Student Timer

* Home centers sell sand for sand boxes, landscaping, paving, mortar etc.  Beaches are another source, although you may encounter undesirable contamination. Sifting non-homogeneous sand with a fine kitchen strainer may yield two usable grades of sand. 

** secondary containment to prevent accidental spillage of water onto the balance

Background Soil Vocabulary:

Porosity is the measure of how much groundwater a soil can hold, permeability is the measure of how quickly water passes through a soil, while retention is the measure of how much water stays behind.  Even elementary students can relate these concepts to their everyday lives. They observe that some areas in their yards or school grounds form puddles while others drain quickly after a rainstorm. They may wonder why one neighbor’s garden and yard remains lush and green although a sprinkler is rarely used. Children in communities dependent upon well water can understand the importance of replenishing the water table. In most rural and many suburban areas, homes use septic tanks and drain fields to process household wastewater. The “water cycle” is a topic in elementary science curricula. There are many excellent age-appropriate online sources for information on these topics including the United States Geological Survey (USGS) and the GLOBE program. Read the rest of this entry »

How to Make a Rocket (Scientist)


Tami O'Connor, Educational Innovationsby:  Tami O’Connor

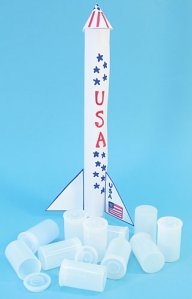
A few months ago I had occasion to conduct two hands-on workshops for elementary and middle school teachers at the NSTA National Convention in San Francisco on behalf of Educational Innovations.  One presentation focused on film canister rockets.  This is a tried-and-true way to teach Newtown’s First and Third Laws of Motion and also brings to light concepts such as the four forces of flight; thrust, drag, weight, and lift.  It also reinforces instruction on 3-D shapes and 2-D plane figures such as circles, cones, cylinders, rectangles, and triangles.

How to Make a Rocket Scientist - Educational Innovations BlogI presented the lesson to the teachers in much the same way I would to my students.  The first thing we did was to brainstorm the features all rockets have.  After a bit of discussion it was agreed that they all have a nose cone, a cylindrical body, fins, and an engine.  I then handed out a paper template imprinted with the pattern of a nose cone and fins, a regular 8½ x 11 sheet of white paper, a piece of goldenrod paper, and a white translucent film canister.  Also required are scissors, tape, ¼ piece of an Alka Seltzer tablet, and paper towels.

The only canister that works with this rocket is the type that has the lid that fits snugly inside the canister.  The canisters that have a lid that wraps around the outside rim, however, will not allow enough pressure to build up inside the chamber.

How to Make a Rocket

The first step in building a film canister rocket is to construct the body of the rocket.  The easiest way is to curl the white 8 ½ x 11 paper into a cylindrical shape using the film canister (without the top) as a guide.  The paper can be rolled around the film canister and then taped along the edges.  The easiest way to recover the film canister is to blow into one end of the rolled cylinder, forcing the canister out the other end. Read the rest of this entry »


Newton’s Apple


by: Matthew Morris

Newton was a revolutionary thinker of his time. He is responsible for the three laws of motion that we still use today;

1. Objects that are not in motion remain stationary unless acted upon by another force.

2. There is a direct relationship between the force acted upon the object and the mass of that object times the acceleration the object feels (F=ma).

3. For every action there is an equal and opposite reaction.

Nobody before Newton could explain why objects acted the way they did, but with these three laws he quantified movement in terms everyone could understand.

But there was a problem with his theory; if all motion had to be caused by some force acting on it, then why do objects fall towards the earth when you release them from a fixed position? This free falling object was in fact free, meaning free of outside forces acting upon it (besides wind resistance). There were no visible forces acting upon that object. So why do they move downward if nothing is acting on it? But Newton explained this motion with gravity. He said that gravity is a force that the earth has upon all objects, something invisible that pulls us down at all times at a constant acceleration. There is a myth that the way Newton thought of the idea of gravity was when he was thinking about it under an apple tree when an apple fell on Newton’s head and at that moment, he figured out that there must be a force pulling the object down. This is also why apples are used to demonstrate Newton’s force, but no one knows definitively if the myth is true or not. Read the rest of this entry »


Talking Tapes | When You Want Your Students To Make Noise!


Tami O'Connor, Educational Innovationsby: Tami O’Connor

On a field trip with my 5th grade students to a local science museum, we saw one of the science instructors conduct a lesson on sound. It was such a simple idea, with easy-to-find materials, that I brought it home to do with my Girl Scout troop the following week.  Since then, I have modified and expanded the lesson so it would fit any elementary or middle school grade lesson plan on sound.

Read the rest of this entry »


How Do Tides Affect Marine Animals?


Dr. Helen Pashleyby: Dr. Helen Pashley

Objectives:

1.    Students will brainstorm factors that might affect an animal living on the seashore at high and low tides.

2.   Students will identify strategies that shore animals use to survive conditions at low tide.

3.   Students will design an experiment to test whether the strategy adopted by their simulated shore animal would be effective in helping it survive low tide.

Focus Question:

How do marine animals survive low tide?

Background:

The seashore is an inhospitable place for marine animals to live. Seawater has much less temperature variation throughout the year than air.  In other words, during the summer in New York it can be 98˚F but the sea isn’t much warmer than 75˚F. In the depths of winter it can be –10˚F on land, but the water will be 48˚F. Animals that spend all their lives out at sea have a fairly steady environment. Those that are exposed to air at low tide, may face broiling hot temperatures in summer and freezing cold temperatures in winter.  They may be soaked in fresh water when it pours with rain, and pounded by rough waves during a storm. Animals that can survive on the shore have to be tough! Read the rest of this entry »