By Chris Herald
NSTA STEM Teacher Ambassador 2017
I always love when Spring arrives because we start physics topics in my eighth grade physical science class! Don’t get me wrong—my first love is chemistry and I have a Master’s degree to prove it—but there’s just something about physics in the Spring. My students delve into the topics of speed and momentum with great gusto. Two highlights? Rolling marbles down a ruler and designing their own Hot Wheels experiment. Not only are these students exploring some key physics topics, they are ALSO getting a chance to dabble in engineering: a great combination!
I am sure plenty of other teachers have faced this dilemma: What critical thinking activities will keep my students engaged on the day before Spring break? My solution is allowing students to build their own roller coasters out of pieces of pipe insulation. It’s a wonderful exercise in critical thinking, testing variables and learning about potential energy, momentum, friction and more. Plus, it’s a lot of fun!
While students are busily engineering their coasters, I relish eavesdropping on them. They discuss physics in a way that shows they genuinely understand the concepts and enjoy the task at hand. In fact, this project has become such a class favorite over the years that I once had a student who refused to start his Spring break until after he built his coaster, because his older siblings had told him how much fun it was!
Let’s start building coasters
This activity begins with a short conversation about roller coasters. Most students are familiar with amusement park rides and can describe what makes certain coasters especially thrilling. You may want to share this “Engineering Thrills” article from eGFI (a blog created by the American Society for Engineering Education), or perhaps even have them view this video:
Next, split students into groups of three or four. Instruct them to design a coaster on a piece of scrap paper. Their design should include at least one loop, one curve, and a straight run. Have them brainstorm names for their roller coasters.
If their idea is “funded”—that is, approved by the teacher—they’re ready to receive their building supplies: one marble, a long piece of masking tape, one cup, and six pieces of pipe insulation. (The insulation can be bought at any hardware store and cut in half lengthwise.) The marble acts as the coaster car and the cup catches the marble at the end of the ride.
Students build and modify the placement of the insulation in order to successfully get the marble from the starting point into the cup. It doesn’t take long before groups realize that their coaster should start from the ceiling, where it has the most potential energy. Obviously I talk to students about safety issues before they are allowed to stand on chairs or tables.
As students build…
I question each group about forces, momentum, and engineering. Questions such as:
- Can the marble have too much potential energy?
- Is there a place where the marble does not have enough momentum? Too much?
- What forces are acting on the marble?
- At what places does the marble have its highest potential and kinetic energy? (Stickers can be placed on the insulation to represent their guesses.)
- What concepts does a mechanical engineer need to design a fun coaster?
- What are the limitations an engineer might encounter when building a coaster?
- How would they redesign their coasters if they could start over?
- How important is it for engineers to test their designs?
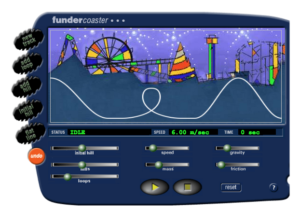
Students can test their coasters with different marbles (different sizes or materials) or calculate the speed of the marble. They may also enjoy trying an online simulation such as the Funderstanding Roller Coaster.
If you have time, I highly suggest having your students present their roller coaster to the entire class. They should discuss where the marble has the highest and lowest potential energy and speed. It’s a great way for them to show off their engineering work, and gain useful feedback from their peers. But be warned, it is hard to stop them if their marble hasn’t been successful in traveling the whole path of their designed roller coaster.
Next up, aMAZE-ing mazes!
Another activity my students love is designing and building their own mazes. (It’s also a great way to recycle your old grocery store cardboard boxes.) Like engineers, they must plan ahead by drawing a simple design and planning their budget based on constraints such as materials and cost.
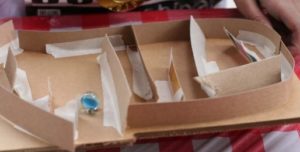
You may be surprised to learn that some students don’t even know what a maze is! That’s why I often start my lesson with this three minute video, LEGO Marble Maze Game. After watching the video, I lead the class in a discussion about other mazes and marble toys to make sure they understand how mazes relate to concepts like momentum, speed and forces.
Next, I instruct students to form small groups or work individually. They must develop a budget to design a maze for a marble and then create it with their chosen supplies. I distribute a list of supplies (click here for a reproducible Cardboard Maze Budget Worksheet PDF) and tell students they need to determine which supplies will work best and keep them within their $3.00 maximum budget.
They need to decide where the maze will start and end, and determine which supplies to use. I remind them that they must not push or launch their marble—it should begin moving once they give a slight tilt to the base of the maze.
Once I approve their budgets, they start to build a maze with their supplies. As I circulate around the room, I ask students why they chose certain materials. Is cheaper better? How is this like a civil engineer planning a street for traffic?
As students build…
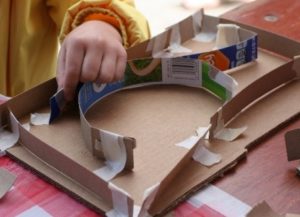
I walk around asking more questions, such as:
- Was your first design successful?
- How would you redesign the maze so the marble moves around the whole maze?
- Is a frame around the outside of the flat cardboard cost effective?
- What are ways you can prevent the marble from falling out of the maze?
- Are there ways to change its speed?
- Where is friction observed?
- How can this knowledge be used outside the classroom?
When individuals or groups complete the task, I give them a chance to try each other’s mazes. Whose maze was the most fun? The most complex? What makes a maze successful?
Time permitting, I like to also introduce my students to a STEM career like civil engineering. The It’s Cool to Be a Civil Engineer video and lesson from PBS are a wonderful resource.
Final notes:
The two activities listed here can be done with any age group. These activities address NGSS performance expectations in PS2: Motion and Stability: Forces and Interactions. They focus on helping students understand ideas related to why some objects will keep moving, why objects fall to the ground and why some materials are attracted to each other while others are not. Students answer the question, “How can one describe physical interactions between objects and within systems of objects?”
Some related products from Educational Innovations:
Sometimes gathering all the materials for this can be hectic. Educational Innovations sells Wall Coasters 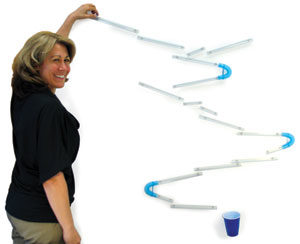 that are easy to use and quick to assemble. These reusable coaster kits are a great way to keep the class busy and keep the clean-up process to a minimum.
If you’re looking for something a little bit more advanced, check out Star Coasters. There are two kinds of Star Coasters, offering two distinct levels of challenge and fun. Star Coaster Level 2 is a great starter coaster. The Star Coaster Level 5 is more complex, and great for a DIY enthusiast.
The Squiggle Ball adds an extra element of fun to your students’ maze-building exploits. Take a look!
Other popular engineering products from Educational Innovations include the Working Wood Catapult Kit, the versatile DazzLinks Kits, or the colorful Lux Blox Kits. These are sure to provide your students with the opportunity to get hands-on experience building as well as working in teams.
You can explore even more Educational Innovations’ engineering products here.


