 By: Donna Giachetti
A Lesson on Electricity… with Elmo
Even babies understand the difference between ON and OFF. After mastering peek-a-boo, turning a switch on and off is one of a toddler’s favorite games. What will happen if I press here? Where did that light come from? Who made that noise? Something nearly always happens when a button is pushed, and it leaves children wanting to know more. At least that’s how it went in my house. My son wasn’t satisfied squeezing Tickle Me Elmo’s belly to hear the little guy giggle. He soon figured out how to switch Elmo on-off-on-off so rapidly that the poor fuzzball appeared to have a bad case of the hiccups.
Aside from Elmo, plenty of other things can be turned ON or OFF. Your kitchen faucet, for instance. Turn it ON and the water moves through the pipes inside your walls until it flows out the faucet and into your glass… or perhaps down the drain.

So you fill your glass, quench your thirst and turn the faucet OFF. Simple, right?
It would be easy for most people to think about electricity in the same way: push up on your wall light switch and—voila!—the room is illuminated. Push down and you’re in the dark. Electricity pours out when we need it and then, as in our faucet example, it’s tapped closed again.
But an electrical current doesn’t simply flow in a straight line from an energy source (like a battery) to its final target (like a lamp). How—and why—electricity works is more elegant than that.
Electricity flows in a loop called a circuit which begins and ends at the energy source. If the electrical current doesn’t travel the entire length of that loop, you’re back in the dark.
An Electricity Kit for All Seasons
Educational Innovations’ Light Bulb Experiment Kit offers teachers a remarkably easy way for students to understand the circuit concept and quickly move into dozens of experiments on parallel, series and combination circuits. My favorite part of the kit is that you can test so many unique variations with a single light bulb—even though the kit is stocked with 10 bulbs.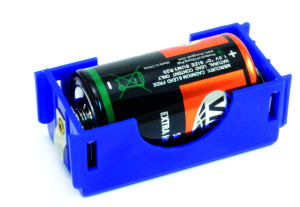
The key is the D Cell battery holders (and of course, the batteries themselves). This electricity kit comes with eight of these beauties. One holder may not seem like much on its own, but once you start connecting them… you’re ready to shine a light on a memorable lesson in electricity.
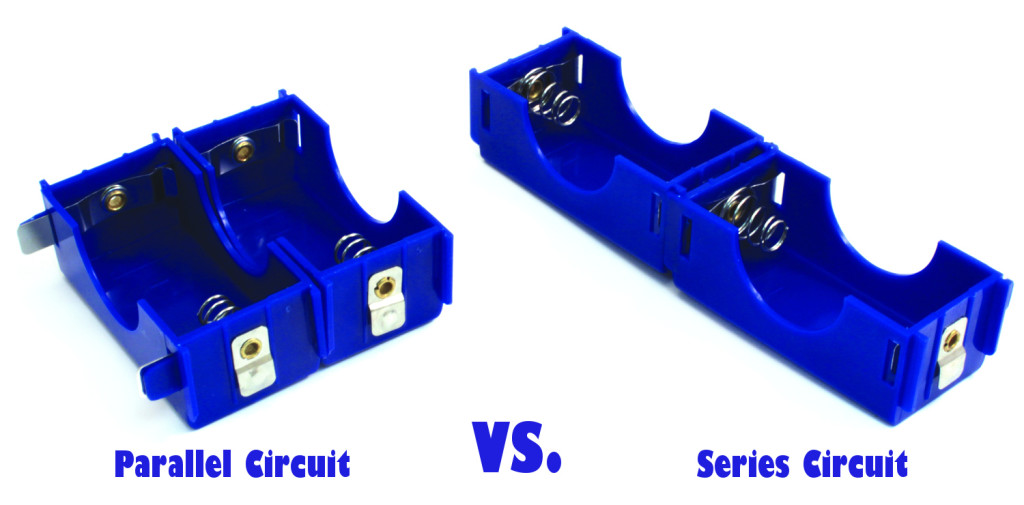
The trick is in HOW you connect them. Distribute a few cases to students and invite them to examine the components. Make sure they recognize that all the cases are identical.
Ask several students to hook up two or more plastic cases. Some will click them together side-by-side; others will line them up end-to-end.
Now bring out the jumper wires. (The electricity kit comes with 4 apiece, red and black. Although it doesn’t matter for the purposes of your demonstration, it’s wise to remind students that black usually represents NEGATIVE and red usually represents POSITIVE.)
Use the red and black jumper wires to connect each pair of battery cases to its own light bulb screwed into a Fahnestock clip.
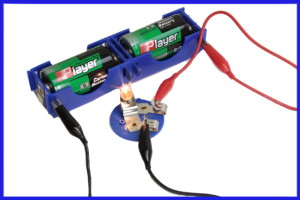
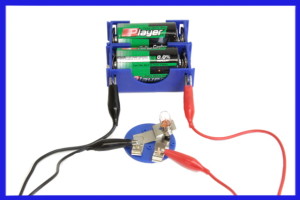
Your students will easily notice that one bulb is burning much brighter than the other. And, like the 3-year-old with her finger on the ON / OFF button, they will want to know why this happened.
Before you can get to that answer, you’ll need to explain some basic terms. Let’s start with the two different ways the battery holders have been configured. When the battery holders are connected side-by-side, they are PARALLEL. When they are connected end-to-end (kind of like a string of holiday lights), they are in a SERIES.
A Few Basic Terms…
When we talk about electricity, we typically talk about three things: watts, voltage and amperage. These are universal units. Each one measures something different.
Watts are a basic measure of power.
Voltage is the standard unit of electromotive force. You can think of it literally as a pushing force. The higher the voltage, the harder the electricity is being pushed through the circuit.
Amperage is the equivalent of volume. When you think about how much amperage is available, you are basically asking, How big is your “container” full of electricity?
Other key words you’ll need to introduce to your students:
Circuit: Electricity flows in a loop called a circuit which begins and ends at the battery pack.
Load: Any device that consumes the energy flowing through a circuit and converts that energy into work is called a load. A light bulb is an example of a load; it consumes the electricity from a circuit and converts it into work (in the form of heat and light).
Okay. So why did the light bulb shine more brightly in the series circuit than it did in the parallel circuit?
Because two batteries in series offer twice as much voltage to the bulb as compared to a single battery. The amperage is the same but the voltage is doubled. Remind students that voltage is a pushing force. Twice as much voltage means we are pushing electricity through the bulb twice as hard. The result? The light bulb will shine twice as brightly—but it will only burn for the same amount of time as a single battery.
At least one of your students is bound to point out that the parallel circuit also relied on two batteries. What gives?
In parallel circuits, the voltage doesn’t change. You could add 10 batteries… 100 batteries… and the light from the bulb wouldn’t get any brighter. When you add batteries in a parallel circuit, you are essentially (to use our volume analogy) increasing the size of your “tank.” You are increasing your amperage, not the voltage. So with two batteries hooked up in a parallel circuit, the light bulb will burn twice as long—but it will not be twice as bright.
So much great learning will take place after you lay down the basic framework and allow your students to “play” with this electricity kit on their own. After all, the best discoveries are often made by accident. There’s also an eight-page lesson (in PDF format) on our website if you’re looking for even more ways to create an assortment of series and parallel circuits.
Educational Innovation’s Light Bulb Experiment Kit contains all the elements you’ll need for a well-rounded, hands-on lesson in the basics of electricity. There are dozens of ways these components can be combined! Remind your students not to be discouraged by “failed” attempts when the circuit did not loop back to the power source. In science, as in life, learning happens at even the most unexpected moments.
Just ask Elmo.