 by: Tami O’Connor
After the birth of my youngest child I decided to get a teaching position at a school closer to home. Until that point, I had only taught in the elementary grades. As it turned out, a seventh grade science position had opened up in the middle school in the next town, and, shortly after I filed my application, I was called in for an interview. Because it was already early June when the opening occurred, things moved along rather quickly.
The day after my interview I was called back to schedule a time to present a lesson to a class of students. The only day available just happened to be the second to last day of school, and the only class available just happened to be an 8th grade class… The school only went up to 8th grade, and on the last day of school, these 8th graders were participating in their moving up “fun” day at a local amusement park…
 Now, anyone reading this probably recognizes that these kids—on the second to last day of their eighth grade year—had absolutely no interest in learning anything more from any of their regular teachers – much less a teacher they had never seen before. So, to say I was a little nervous is an understatement. I learned that they had just completed a unit on space, so after scouring my brain to come up with an interesting hands-on lesson that related to space, I decided to bring in the microscale vacuum apparatus from Educational Innovations.
Since most middle schools don’t have access to one, very few eighth grade students had ever seen a vacuum bell, so I gambled that the lesson I selected would hold their interest. With two team teachers, the science department chair, and the principal in the room to observe, this really was a lesson on “pressure!”
The Lesson
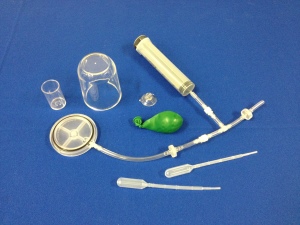
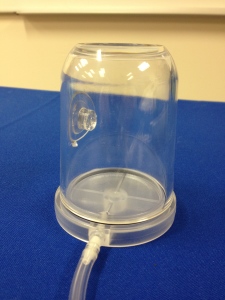
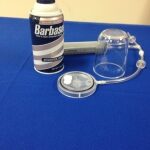
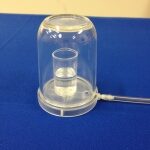
I got started talking about air in general and asked the students what they knew about it. Following this brief introduction I broke the class into groups of three and gave a quick description of the microscale vacuum apparatus before I handed them out to the students. I allowed two or three minutes for everyone to explore the syringe, tubes, one-way check valves and the chamber, itself. I showed the class a suction cup, and then we talked about why they appear to stick to smooth surfaces.
We discussed the fact that we live on the bottom of an ocean of air, and at sea level approximately 15 pounds of air presses on every square inch of surface. So, it’s actually the outside air pushing on the suction cup that keeps it pressed against a surface rather than the cup sucking on the surface that keeps it in place. I explained that as you get higher in the atmosphere, there is less air, hence less air pressure. Just like in a swimming pool, when at the bottom of the deep end, you (especially your ears) can feel the pressure that water exerts on top of you. That analogy helped them to better understand why their ears “pop” when they are in an airplane that changes altitude or even if they drive up a steep incline. One of the students volunteered that he had seen the high altitude cooking instructions on a cake mix box, and many of his classmates nodded in recognition.
 We then did a quick math exercise. After we discussed the formula to find the area of a circle, we calculated the size of suction cup they would need to suspend a 1967 VW Beetle (1850 lbs) from the ceiling. I then handed out small suction cups and asked the students to press them to the inside wall of the vacuum chamber and then evacuate the air. Even though they knew what would happen, there were audible gasps when the suction cups fell off the wall once they evacuated enough air from the chamber.
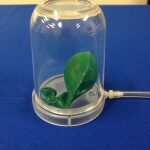
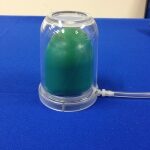
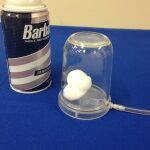
I then handed each group the written activities that are included with every vacuum chamber and became an observer. The students expanded limp, sealed balloons until they were the same size as the chamber, enlarged mini marshmallows, popped bubble wrap, grew shaving cream, and even boiled water.
It was obvious about ten minutes into the lesson that I would be offered the position. All 23 eighth graders (on the second to last day of school) were totally engaged in the activities I gave them. My role, after giving the quick lesson, was to circulate through the lab groups, ask questions, answer questions and watch the learning take place. The kids needed no push to stay on task, and I was delighted.
A Challenge
 Of course, there’s always that one group that completes the activities and figures out all the answers before the other groups. These tend to be the brightest students and as such can also be a tad more disruptive. For them, there was a special challenge. Their task was to design and test a plan using the microscale vacuum apparatus to transfer water from one filled pipette to another that is empty. They were allowed to use all materials included in the kit to complete their goal.
Using the knowledge gained throughout their explorations, they had to communicate their thoughts and construct a plan to solve their problem. When you consider Bloom’s Taxonomy of Learning, this is clearly synthesis and evaluation at its finest!
The solution is not as easy as it might seem, and, of the few groups that tried it, only one was able to solve it. The beautiful part was that even after we wrapped up the lesson by discussing what they learned that day, more than half of the students had to be shooed out the door to go to lunch because they wanted more time to find the solution to the problem. It just doesn’t get any better than that! And did I mention, this all happened on the second to the last day of school?
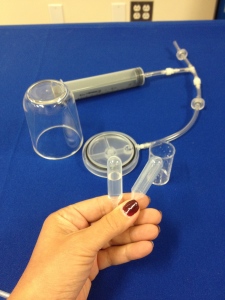
I made a great modification to the tubing. I cut the tubing between the fitting that goes into the base plate and the first valve.
I inserted a T connector. I then add a piece of tubing to the third part of the T and added a luer lock valve. This valve can be connected to a vernier pressure sensor and students can watch the pressure go down as they pump out the air.
I also cut the stem off of a 5 mL syringe. Placed a cap on it and placed it in the chamber. Students can see the volume change.
I’d be happy to share pictures of my modifications.
That would be awesome, Rick! Please send the pictures to tami@teachersource.com.