 Look, Mom, No Wheels! Building a Hovercraft Science Project
by: Norm Barstow
The first practical design of the hovercraft was completed in the late 1950’s by British engineer, Sir Christopher Cockerell. Since then, the continued development of this invention has been ongoing, and currently, the hovercraft is being used commercially, by the military, and for personal use. Teachers have been constructing versions of the hovercraft using balloons, film canisters and flat materials in classrooms for years.
The principle behind the hovercraft’s levitation is that when the air is released from the balloon, it hits the ground and rushes outward in all directions. The air flowing from the balloon through the holes forms a layer of air between the hovercraft and the table. This reduces the friction (the resistance that occurs when two object rub against each other) that would have existed if the hovercraft rested directly on the table. With less friction, your hovercraft scoots across the table.
Furthermore, extra air molecules are packed underneath the structure, which in turn increases the pressure under the hovercraft. This increased pressure below the craft produces an overall upward pressure force on the craft therefore it supports its weight. Since air molecules are always leaking out from beneath the craft, you’ll need a source of air molecules to replace them, which is provided by the balloon.
Materials:
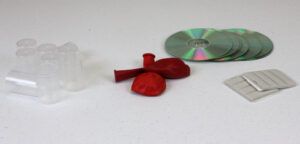 Large balloon (12”-16”)
- One plastic film canister
- Hovercraft base: choose from one of the following:
· Large plastic plate (not the inflexible type)
· Foam meat tray from grocery store (6.5” X 8.5”)
· Old CD
· Stiff cardboard
- Poster putty such as Blue Tak, or Poster Tak
- Smooth surface
- Hole instrument: Ball point pen tip or hot nail or drill.
Construction of the Hovercraft:
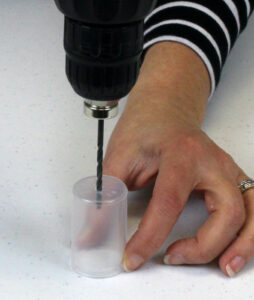
1. Find the center of your base and make a hole (3/32” or about the size of the hole in a spool of thread.) Caution. If you use the plastic plate, it is best to use a hot nail because a ballpoint pen tip will not make a round hole. Use vise grips to hold the nail and heat it over a flame.
2. Make a similarly sized hole in the bottom of the film canister. You can use a ball point pen here or a hot nail.
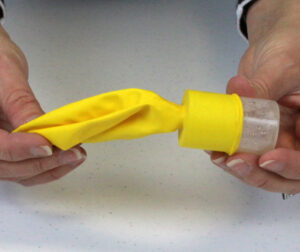
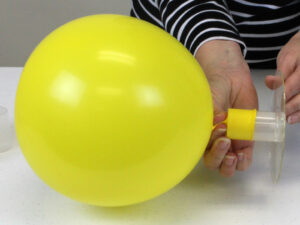
3. Stretch the balloon and fit the opening over the open end of the film canister. Be sure to fit the balloon far enough onto the film canister so the neck of the balloon keeps the inflated balloon upright and does not flop over.
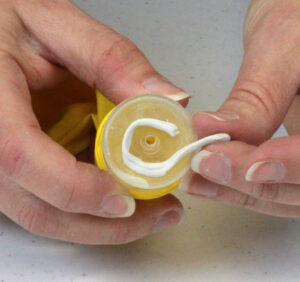
4. Make a ring of the Poster Tak around the hole in the base. Be sure not to cover the hole. The ring should be the diameter of the film canister base.
5. Inflate the balloon by blowing through the hole in the bottom of the film canister. When it is fully inflated, have a partner pinch the neck of the balloon or twist it so it doesn’t deflate.
6. Carefully set the balloon/film canister assembly on the ring of poster putty and press down to seal.
7. Place the Hovercraft on a smooth surface and let the air flow.

8. Give it a little tap to get it going.
Here is a step by step video to help you get going:
HINTS and SUGGESTIONS:
- Place a piece of tape over the base of the hovercraft until you’re ready to launch.
- Experiment with inflating the balloon, twisting it to seal in the air, and then trying to fit the balloon neck over the film canister opening.
- Experiment with different hole sizes, bases, balloon sizes.
If you are interested in purchasing a kit with all the materials necessary to build your Hovercraft with your class, you can purchase one from Educational Innovations at www.teachersource.com.
[…] recently used this extension of the balloon-CD hovercraft plans in Norm Barstow’s blog for a middle school physical science lab, but it could be easily adapted for a high school IPS […]