 by: Ron Perkins
Cartesian Divers are one of the oldest and most interesting toys you can build at home. While they are easy to construct, there is a lot of science behind the workings of this deceivingly simple toy. A Cartesian Diver is an object whose density changes with pressure. In fact, most Cartesian divers become denser as pressure is increased. By constructing a Cartesian Diver carefully, it is possible to make a diver that floats in water at atmospheric pressure, and sinks when the pressure is increased.
Water has a density of about 1 gram/ml. Objects that have a density of less than 1 gram/ml float, while objects with a density greater than 1 gram/ml sink. When using sealed divers, as pressure is increased, a Cartesian Diver’s density might increase from about .8 grams/ml to 1.2 grams/ml. When this happens, the diver sinks in water. Cartesian Divers often change their density by changing the amount of water they displace (i.e., changing their volume). When the pressure is increased, the air inside the diver is compressed. This compressed air takes up less space, and thus displaces less water. As less water is displaced, the density of the diver appears to increase and the diver sinks.
Making Cartesian Divers
Materials:
1 Plastic Pipet (PP-222), 1 Ballast Nut (CD-3), Plastic Soda Bottle with Top, Candle, Scissors, Pliers, Water
Optional: cap of a Fizz-Keeper Pump (CD-4), Food Coloring, Aluminum Foil, Hot Melt Glue Gun
Instructions
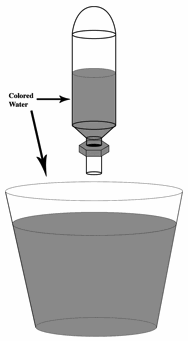
1. With scissors, snip off all but 2 cm of the neck of the pipet.

2. Screw one ballast nut onto the remaining 2 cm neck of the pipet.

 3. Fill the pipet bulb with colored water. Note that the bulb must float when placed in a cup of water. Experiment with different amounts of water, making sure that the bulbs still float. Bulbs that float higher in a cup of water will make divers that are more difficult to sink.
4. Your Cartesian diver is ready! Fill a 1 or 2 liter plastic soda bottle almost to the top with water. Place your diver in the bottle and screw on the Fizz-Keeper pump cap. Try squeezing the bottle. Can you make your diver sink? Now pump the Fizz-Keeper and watch as your diver sinks right to the bottom. Can you figure out how to get it back up to the top?
5. Remove the pump cap, pour out your diver, and try varying its buoyancy. Try filling it with different amounts of water. Put it back in the bottle, replace the pump cap and try sinking it again.
6. When you are satisfied with your divers and would like to make it permanent, you can seal it by sealing the open end of the bulb. This can be done with any waterproof glue, hot glue, or by melting the plastic stem slightly and squeezing it gently with small pliers.
To seal the bulb by melting, first make sure your bulb floats. Once it is sealed, its starting buoyancy cannot be changed! Make sure there is no water in the neck by holding it upside down and tapping or squeezing it slightly. Hold the neck about 1-2 inches above a candle flame until it becomes completely transparent (the change is very subtle). Immediately remove the neck from above the flame and squeeze the end gently with pliers to seal. Let cool. Return your diver to the bottle with clean water and it will last for many years.
There are literally hundreds of experiments you can try! For instance, try crumpling up a piece of aluminum foil into a small ball. Place this in your bottle. See if you can sink it by squeezing the bottle… how about pumping it? Small packets of soy sauce have also been known to work!
Use more pipets and vary their densities. Try numbering your divers and see if you can make them sink in order. Note that your divers are not yet sealed, and so they can be adjusted as many times as you like (colored water will leak out of them until they are sealed).
Educational Innovations carries a full line of Cartesian Diver materials, including Bob Becker’s DVD that demonstrates and discusses a plethora of fascinating diver designs. Bob Becker, an award winning high school chemistry teacher, is a pioneer in the field of Cartesian divers. This DVD includes DVD-ROM which contains additional resources such as project guides and templates.
 by: Tami O’Connor
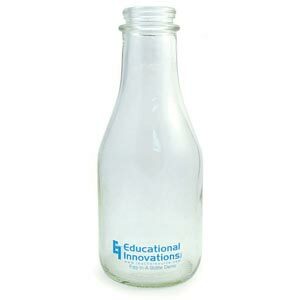
 delivered to grandma’s door. Unfortunately, some students (and some teachers) still think an egg can actually be sucked into a bottle. As you probably know because the air pressure is greater outside of the bottle than inside, the better explanation is that the egg is literally pushed into the milk bottle.


 Posted by Tami O'Connor
  by: Cynthia House

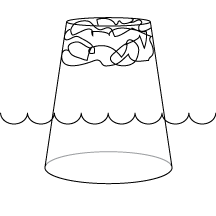
 push the plastic cup into a clear container of water so the cup is completely submerged. Your students should be able to see that, although the air is somewhat compressed within the cup, the paper at the “top” of the cup remains dry.

 3. Fill the pipet bulb with colored water. Note that the bulb must float when placed in a cup of water. Experiment with different amounts of water, making sure that the bulbs still float. Bulbs that float higher in a cup of water will make divers that are more difficult to sink.