by Donna Giachetti
Designing and building an artificial hand is a great science fair or classroom project. It’s also a vivid, “hands-on” way to get your students thinking about how such robotic limbs are used in society and industry. Whether your students work individually or in teams, this activity is a fantastic experience in creativity, problem solving, STEM, and engineering. Plus, for some students, it may even lead to a future career inspiration!
What’s Your Goal?
In the real world, artificial or prosthetic limbs improve the quality of life for amputees, allowing more freedom and independence. In the manufacturing world, robotic appendages have created an entirely new way of manufacturing products. Both situations require that designers think deeply about how to make their artificial creations accomplish a unique task.
As a class, allow students to spend some time deciding what they want their prosthetic hand to do. Will it be used to wave hello? To press a key on a keyboard or piano? To cradle a ping-pong ball or balloon? Once students decide on the unique task they hope to achieve, they’re ready to start thinking about the design process.
If students want to do this activity for science fair, they will need to come up with a variable to test, and an essential question to explore.
Artificial Hand Basics
Obviously there are many ways to create an artificial hand—it all depends on what your goal is. In all cases, a quick study of human anatomy will be helpful. How does the human hand work? Consider the fingers—long, flexible, and solid. Then there are the joints, ligaments, muscles, and tendons, which do the job of bending and stretching. What about the palm? If it will share in the work of holding an object, the palm needs to be sturdy. But then again, some mechanical “hands”—like pincers—don’t even need a palm.
To get students started, you may wish to share these instructions for a simple paper artificial hand:
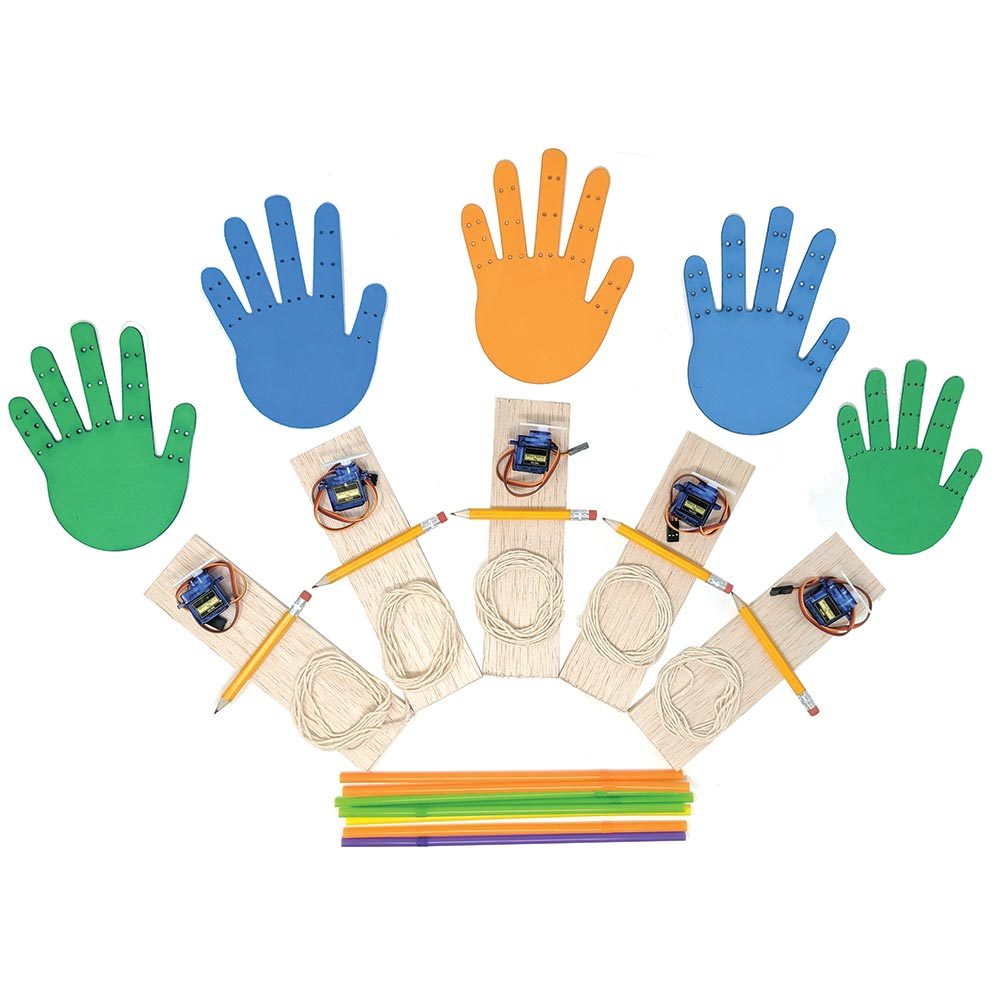
Materials:
- A cardboard plate (but thick paper or thin cardboard can also be used)
- Plastic straws (five or six should be adequate)
- Pencil or pen
- Scissors
- Glue or a glue gun
- Tape (any kind of adhesive tape will work)
- Five lengths of string, each at least 10 inches in length
- Latex glove (optional)
Ten Steps for Building an Artificial Hand
Step 1 – Select the material to use for the hand. Use thick paper, thin cardboard, or a paper plate.
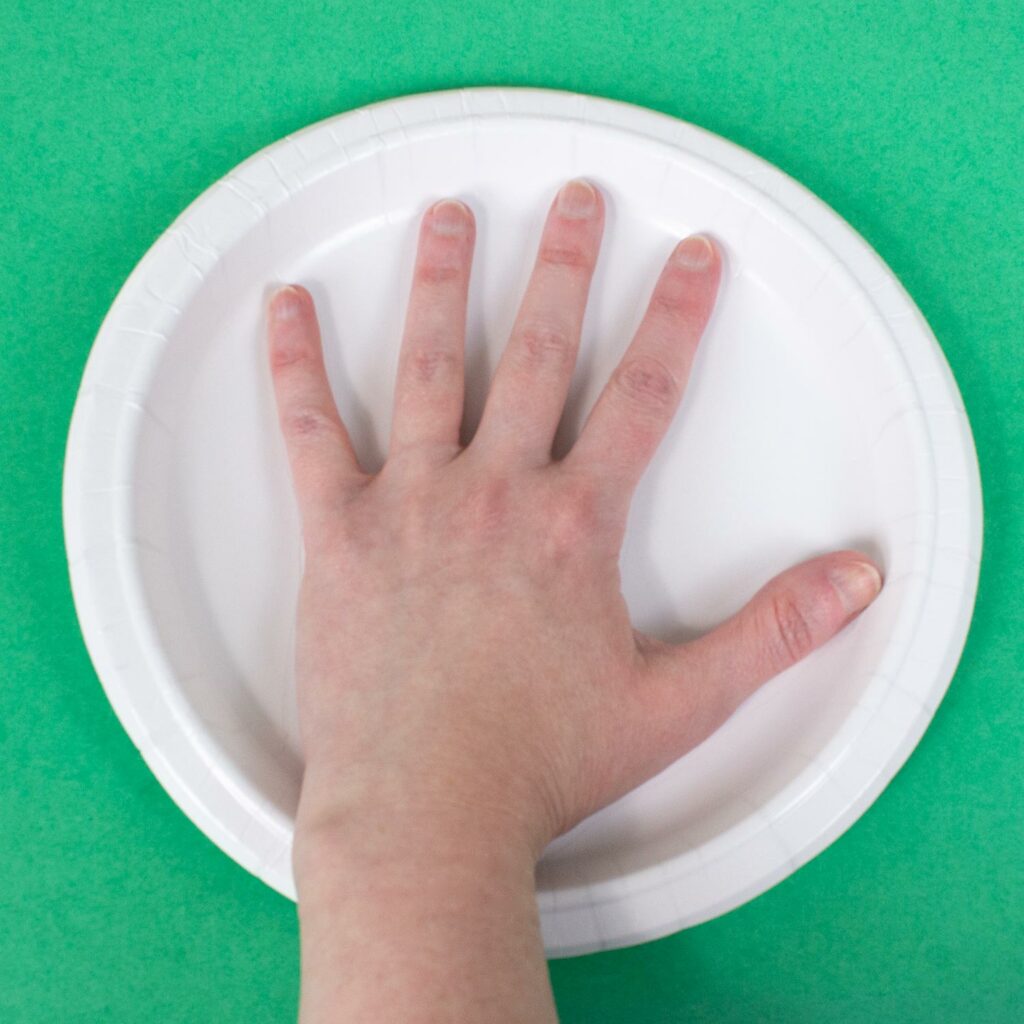
Step 2 – Trace your hand. Spread out your fingers about ½ inch to 1 inch across for the right spacing.
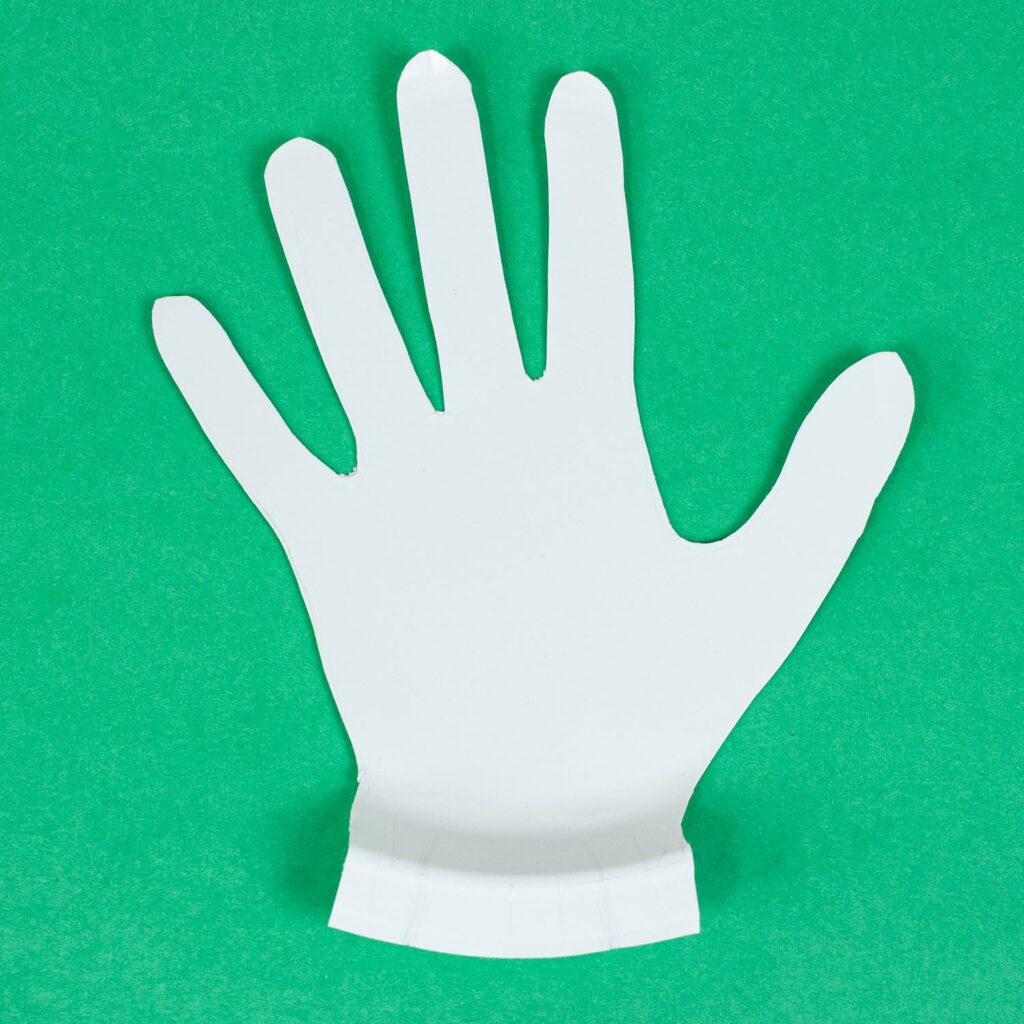
Step 3 – Carefully cut out your traced hand.
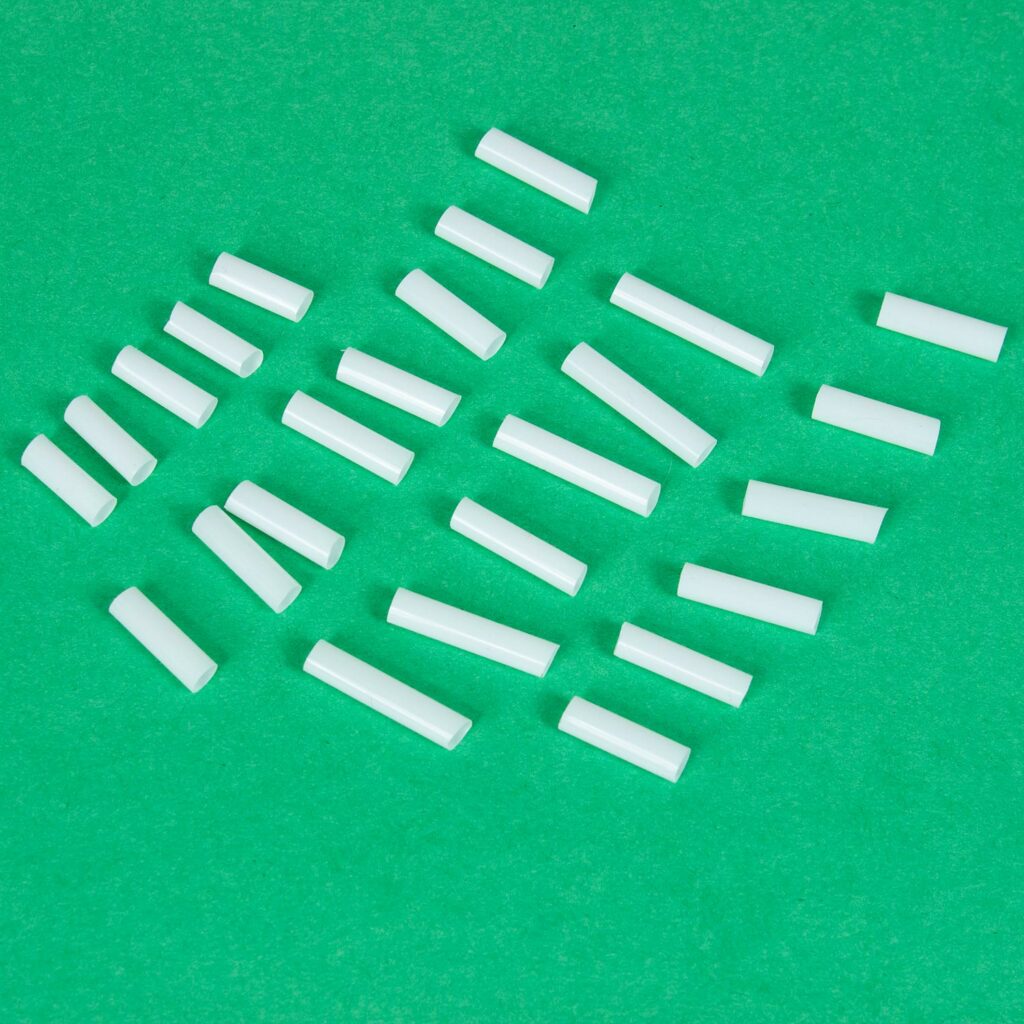
Step 4 – Cut plastic straws into pieces. You’ll need nine pieces at a length of approximately two inches each. You can cut the straws straight across or at an angle—your choice.
Step 5 – In the middle of each straw section, cut out a small V-shaped notch.
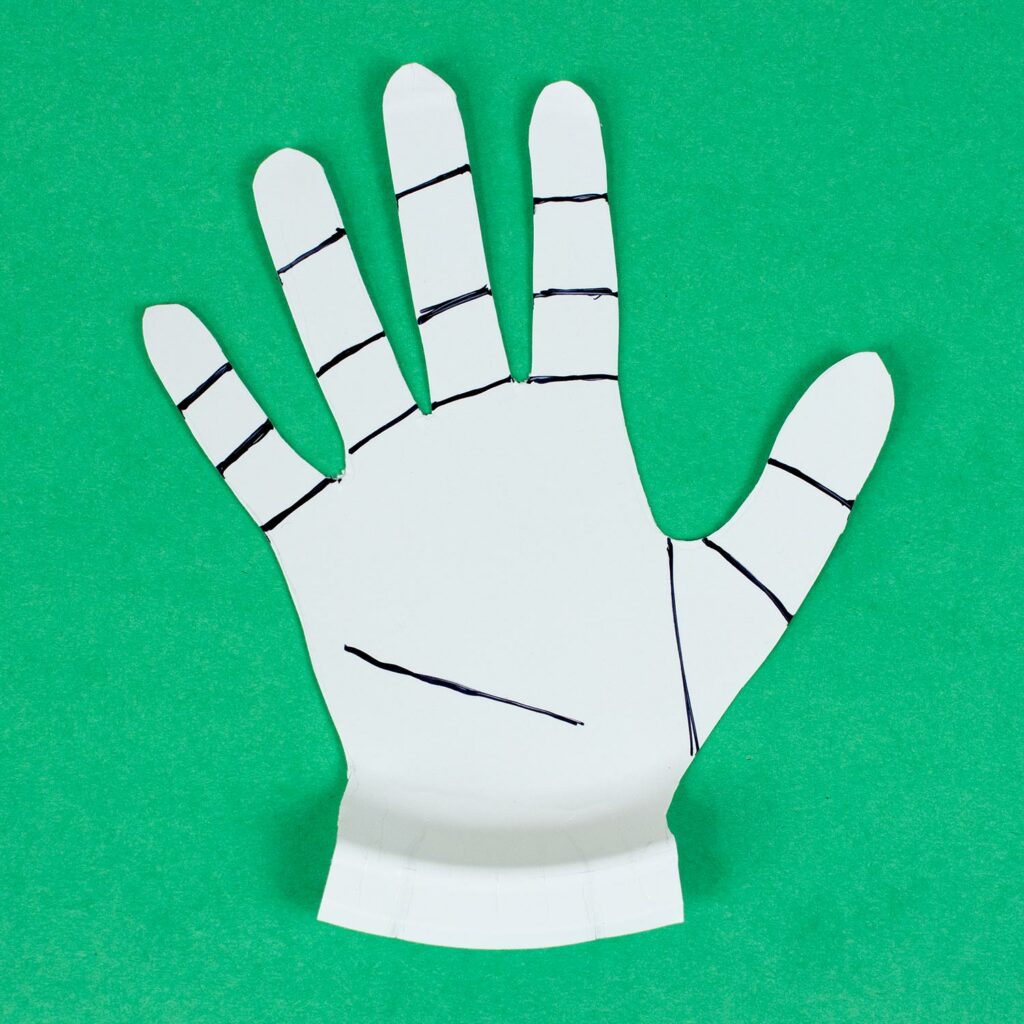
Step 6 – On your paper hand, identify where the joints should be. Examine your own hand to help determine where to mark. Draw a line that starts from about an inch below your thumb to about an inch below your pinkie.
Step 7 – Glue the straw pieces on your hand. Use three straw pieces for each finger—one per joint. The thumb will only need two pieces.
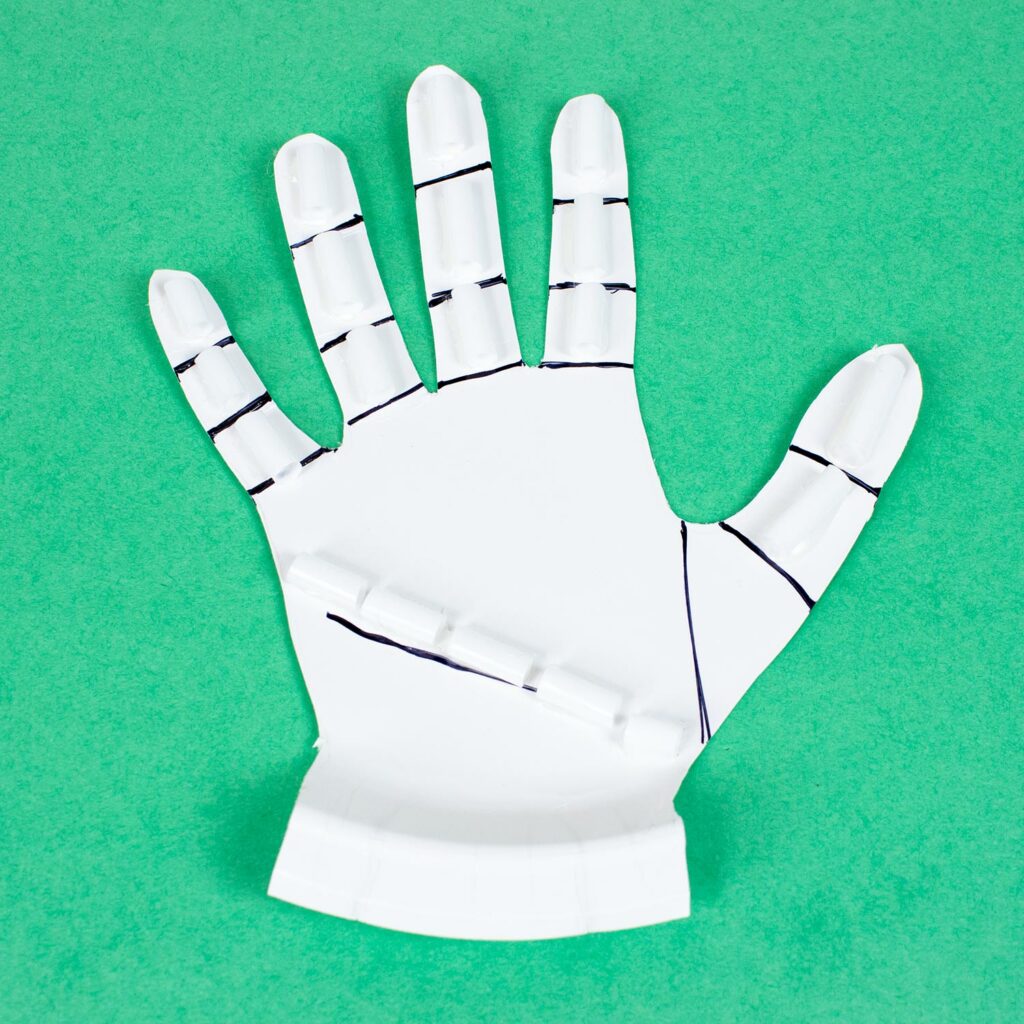
Step 8 – Glue five straw pieces across the palm where you drew the line, connecting the thumb and pinkie area.
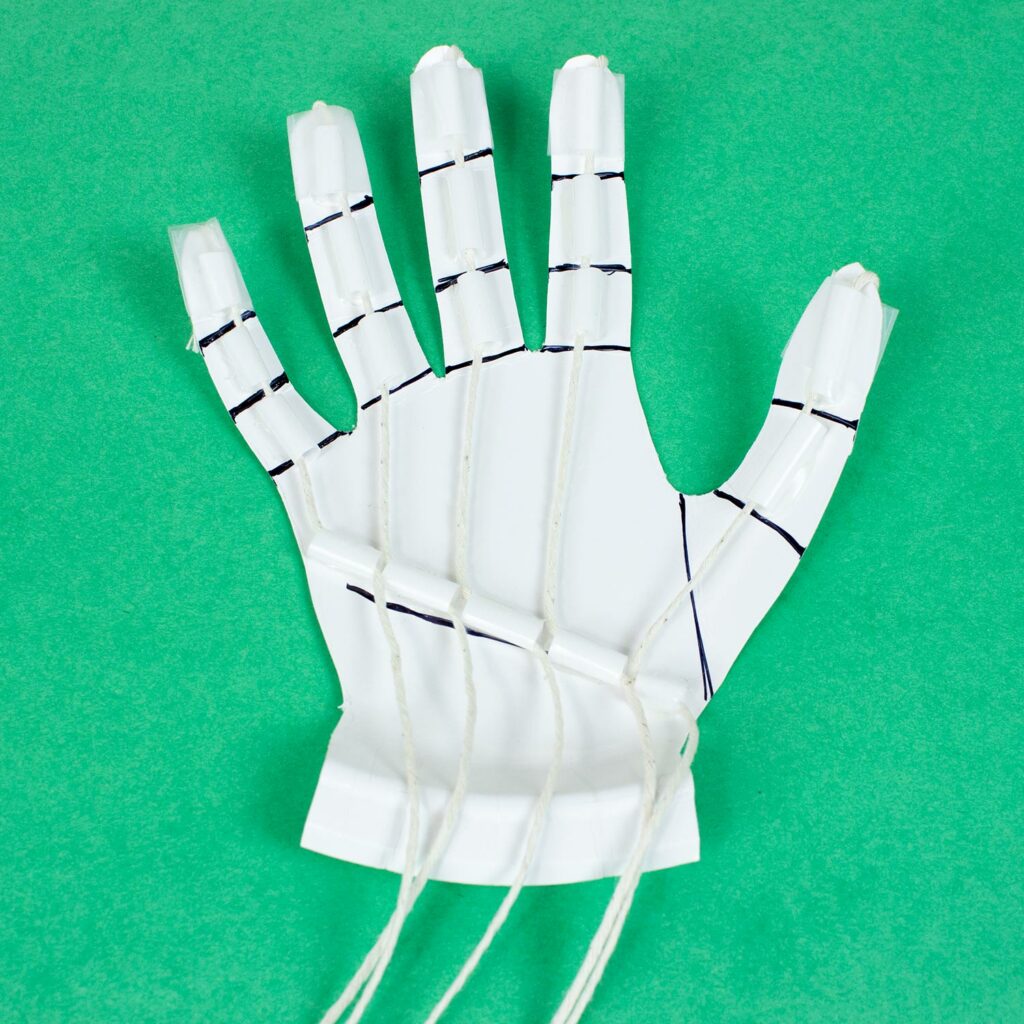
Step 9 – Once the glue has dried, thread a piece of string through each straw piece. You’ll need one string for each finger. Use tape to secure the string at the tip of the finger. Thread each string through the straws to the wrist. Leave about four inches of string hanging out past the wrist.
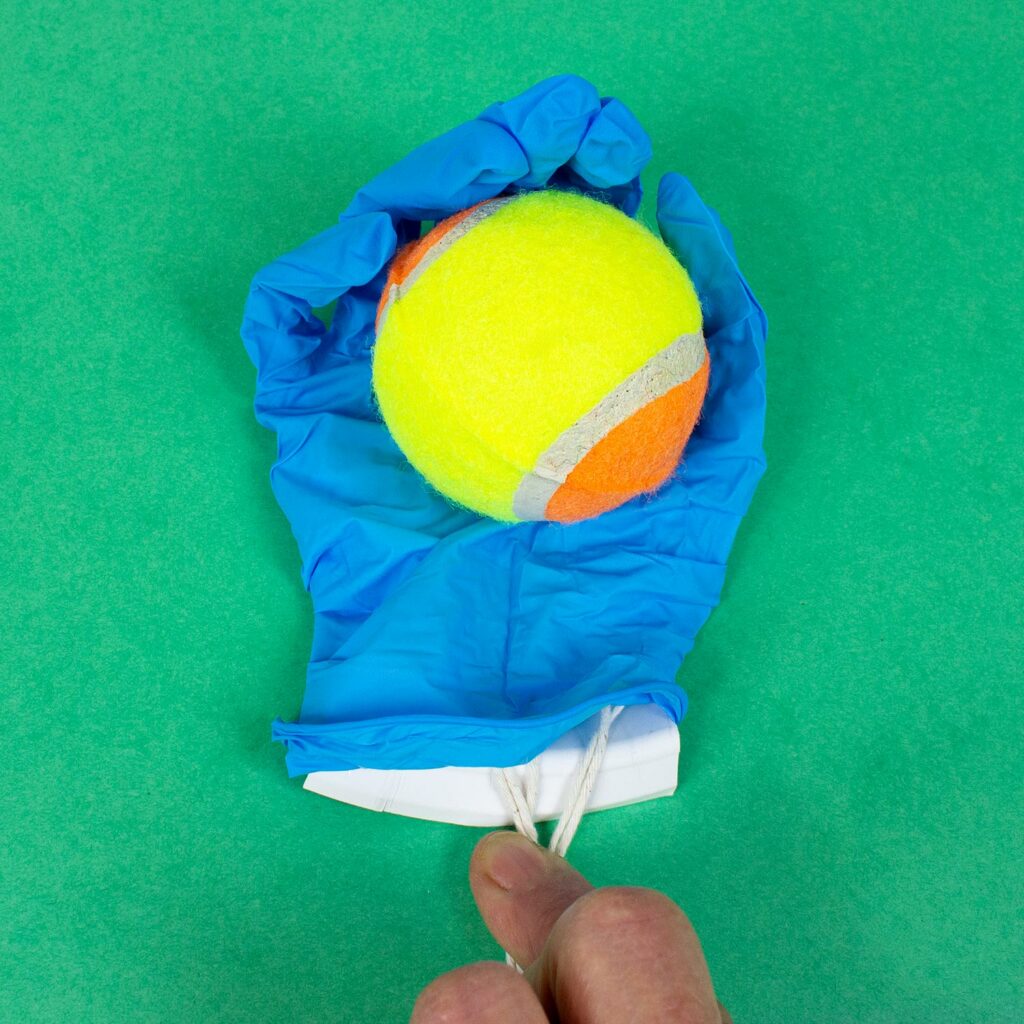
Step 10 – Test it out! Pull gently on each string to make sure that the finger works. Once everything is working, you can cover your artificial hand with a latex glove (for better gripping ability).
Improving the Artificial Hand
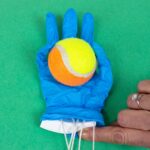
Even the best design can be improved on, and that certainly applies here. Your students’ prototypes might be functional, but can they be improved? After studying human anatomy, the importance of the skin should be apparent. It not only protects, but also helps with grip. Students may want to cover their robotic hand with a latex or nitrile glove or loop a few rubber bands around the fingertips for better grip.
Questions for Discussion
Once the artificial hand is completed, have your students discuss their creation.
- Are they satisfied with the design?
- Did it perform as well as they’d like?
- Would they change or tweak their prototype?
- What lessons about design and prototypes could they apply to other projects?
A Step Further
At Educational Innovations, we know you’re always looking for cutting-edge science tools for your classroom. That’s why we are so excited about the Backyard Brains DIY Neuroprosthetic Kit. It’s an add-on kit that enables students to build cyborg hands they can control with their nervous system! This kit plugs into, and thus requires, any kit that includes a Muscle SpikerShield, like the Muscle SpikerBox, Claw Bundle, or Human-Human Interface.