
By Dr. Kenneth Lyle, Duke University, Durham NC and Elaine “Lainey” Williams
 Thermoplastic Polymers for All!
When thermoplastic polymer became available a couple of years ago, we purchased a bottle to see if it would be a viable addition to our chemistry outreach program. Since then, literally hundreds of people, young and old, have experienced molding the thermoplastic, taking their creations home in Zip-loc® bags.
And now, with the availability of dyes, a whole new world of creative design has opened up. The molding of a thermoplastic activity has been incorporated into our “Polymers” and “Chemistry of Crafts” hands-on outreach presentations, and has been used as a stand-alone station.
Students enrolled in our Chemistry Outreach Service Learning course have employed the thermoplastic as part of their in-class group presentations. As part of their holiday theme, one group had the class make ornaments to decorate the “chemistree,” inserting hooks while the plastic was still soft enough to hang them on the tree.
The thermoplastic is inexpensive; one 250-gram bottle provides enough for twenty-five individuals. The dyes are also inexpensive and, since not much is needed to dye a sample, a little will go a long way. The activity is easy to do. It requires very little in the way of equipment. There is no waste and the thermoplastic can be reshaped again and again. All that is needed is hot water, a glass container and a metal spoon or wooden craft stick.
Thermoplastics are a class of polymers that undergo a transition from a hard crystalline solid to a soft amorphous material when heated. The temperature at which this transformation occurs is referred to as the glass transition temperature or Tg. The Tg for the thermoplastic we use is 60°C. Students are familiar with thermoplastics, such as acrylic, nylon, polyethylene, polypropylene, polystyrene, polyvinyl chloride and Teflon®. Commercially, thermoplastics are employed in consumer goods, machine parts, medical equipment and storage materials.
Molding a Thermoplastic Polymer Activity
Concepts
Polymers and thermoplastics
Crystalline versus amorphous solids
Glass transition temperature Tg
Materials (per individual)
- ~10 g of thermoplastic polymer from Educational Innovations
- 3 pellets of a polymer pigment in red, yellow, blue or black from Educational Innovations (optional)
- 250-mL glass beaker or other suitable glass container
- Wooden craft stick or metal spoon
- Cafeteria tray (optional)
- 5-oz plastic cup and Zip-loc® snack bag (optional)
- Hot plates or other means of heating water
- Large beakers (800-mL beakers) for heating water; each individual requires about 200 mL of hot water initially, and more as needed until the desired shape has been obtained.
Safety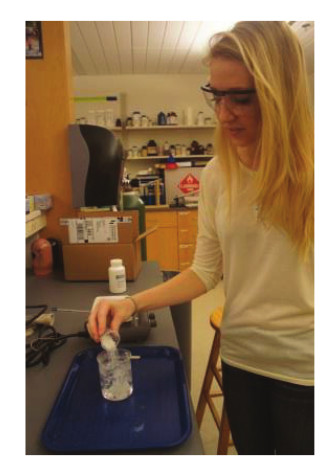
- Wear safety glasses/goggles.
- Thermal burn hazard exists; use heat protective gloves when transferring water to the smaller beakers; warn participants not to touch the beakers of hot water and to carefully blow on the softened thermoplastic and touch it with their fingertip to see if it is cool enough to mold without burning.
Advanced preparation
- Set up hot water stations. Water should be heated to a temperature of at least 60°C; we found that a temperature between 80°C and 85°C softens the thermoplastic sufficiently and allows extra time for molding before reheating is needed.
- Place 10-gram samples of thermoplastic in plastic cups.
Procedure
 Transfer hot water to a 250-mL glass beaker.
- Immediately add the thermoplastic polymer beads to the hot water. If using the dye, add three pellets of the dye.
- Allow time for the thermoplastic to soften and become translucent (about 3 minutes).
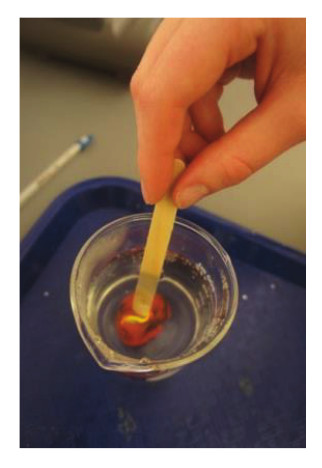
- Using a wooden craft stick or metal spoon, remove the softened material from the hot water; blow on it to cool.
- When cool enough to touch without burning your fingers, begin to mold the material by first squeezing until the texture of the individual beads is no longer visible.
- Continue to mold the material into the desired shape. If the material becomes difficult to mold, obtain more hot water, immerse the material in the hot water to soften, and then continue to shape the material as before.
- Once you have the desired shape, allow the material to completely cool to room temperature. It will become rigid.
- Place the polymer in a Zip-loc® bag to take with you.
Disposal
The thermoplastic is reusable and the water may be safely disposed of in the drain.
Elaine “Lainey” Williams learned the procedure for the thermoplastic shaping activity, tried out various combinations of the dyes, instructed her classmates and shared this activity with 4th-6th grade girls who recently participated in the FEMMES (Females Engaged in More Math, Engineering, and Science) Capstone event. The following are Lainey’s thoughts about learning the procedure, the underlying chemical concepts and sharing the thermoplastic activity with others:
The first time I poured the thermoplastic beads into the glass beaker of warm water, I watched intently as they slowly clumped together and became transparent. When the opaque white plastic had completely transitioned into its soft, amorphous state, I removed the clump from the beaker and began to use my hands to mold the warm thermoplastic. I could pull and form the polymer into any shape imaginable, and when it cooled and hardened, I could simply reheat and reshape the material. My childlike creativity and imagination came quickly back as soon as I held the heated thermoplastic in my hands.
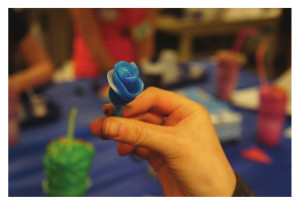
Opening up an extra layer of creativity and fun, Dr. Lyle provided some brightly-shaded polymer pigments to supplement the thermoplastic polymer beads. I added three beads of a blue dye to my plastic. After heating, I could mix and knead the dye and plastic together until the whole plastic became a beautiful, vibrant blue color. I then added two beads of a yellow dye to the now blue plastic, and instead of mixing it in completely, I gently twisted and swirled the yellow dye. The result was a striking marbled effect, with the yellow swirls fading into green before disappearing into the blue plastic. After lots of molding, shaping, and coloring, I was excited to share this particularly creative chemistry activity with not only my classmates, but also any audience I could reach through our chemistry outreach events.
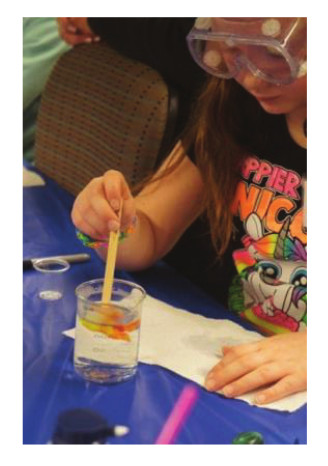
To introduce the “Molding a Thermoplastic” activity at the event, I showed the container of the thermoplastic beads and asked the girls about the color and texture of the materials. They enthusiastically offered their observations—the beads were white and opaque, and they were maintaining their individual shapes, so they were a hard, solid texture. I then explained that at 60°C, this hard, white plastic undergoes a glass transition, and becomes a soft, moldable material that we could form into all sorts of shapes and designs. When asked if they were ready to shape some thermoplastic beads of their own, they all lit up and exclaimed an eager “yes!” in unison.
My team of chemistry outreach volunteers distributed the beads, dyes and water to the girls, and they quickly got started. I was very impressed with the girls’ interest, curiosity and creativity. I saw simple round marbles, complex roses, initials of their name, and all sorts of marbled colors. They were smiling and comparing designs, never losing interest as they continued to shape and reshape their thermoplastic polymer.
Volunteering with the chemistry outreach program has been a gratifying experience. I have watched kids light up when participating. Students follow up with inquisitive, thoughtful questions about the process, showing their level of comprehension and engagement. Several kids express their enthusiasm for science and science as a career. One cheerfully declared that science activities like these are her reasons for wanting to be a chemist someday. For a young scientist like me, leaving such a positive impact has been rewarding.
Educational Innovations has a nice little two-minute demonstration video of their thermoplastic polymer on YouTube. The product is polycaprolactone, a biodegradable polyester polymer.
* Elaine Williams graduated from Duke University with a degree in Global Health.
** Dr. Kenneth Lyle is a lecturing fellow in the Department of Chemistry at Duke University. The Powell Family Trust, the Duke-Durham Neighborhood Partnership, and Biogen Idec – Research Triangle Park fund the Duke Chemistry Outreach Program.
Reprinted with permission from April 2014 edition of CHEM 13 NEWS. For more great chemistry experiments and activities, visit Chem13 News.
is it safe to be use in mouth?
The material itself is non-toxic, but as with any small item, it would be a choking hazard.
~Tami
Educational Innovations