 by: Tami O’Connor
On a field trip with my 5th grade students to a local science museum, we saw one of the science instructors conduct a lesson on sound. It was such a simple idea, with easy-to-find materials, that I brought it home to do with my Girl Scout troop the following week. Since then, I have modified and expanded the lesson so it would fit any elementary or middle school grade lesson plan on sound.
The first thing students must understand is the simple concept that vibrations create sound. Even very young children can grasp this concept. You can conduct a number of activities using tuning forks and such, but the easiest demonstration is to have students touch the front of their throats and hum. Once they understand that the vibration of the molecules in an object creates sound, they find it easier to understand that sound cannot travel through a vacuum (an area devoid of matter).
The lesson I conducted started off with a single piece of yarn. Each child was given a 12-inch length and asked to make sound with it. Generally speaking, very few of my students were successful. Some realized that, by holding one end of the yarn in one hand, and then running the yarn between the nail of their thumb and pointer finger of the other hand they produced a faint sound. This was a good beginning!
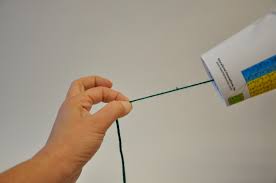
 Next, I gave the students a coffee cup, a paper clip, and a pencil. I asked them to punch a small hole in the bottom of the cup with the point of the pencil and to thread the yarn through the hole. They knotted the end of the yarn inside the cup to one end of the paper clip and then pulled the paper clip to the bottom of the cup. The paper clip was flush with the bottom of the cup, and the yarn extended from the bottom of the cup, like an animal’s tail.
 While doing this, many students realized that, when they inadvertently ran their hand along the yarn, a sound emanated from the cup. Without any additional instruction, the children began to experiment on their own. After a short time, I gave every other student a small cup of water. I instructed them to wet their yarn in the water, without wetting the cup. As these students ran their hand (or, better yet, their thumb nail) down the yarn it was clear that the sound became significantly louder.
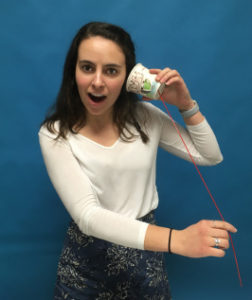
What’s the science behind this activity? The friction between the yarn and students’ fingers caused the yarn to vibrate. Because there was no way initially to amplify the sound, it remained faint. As soon as students attached the yarn to the cup, however, the sound became much louder. This is because the sound waves resonated within the cup and were amplified. This is the principle at work when children play “telephone,” by stringing two cups across a distance. The cups amplify the vibrations carried by the string to the listener’s ear.
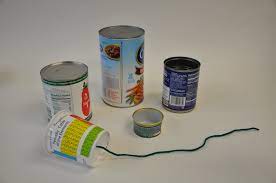
 Similarly, children can change the pitch of the sound by changing the size of their mouth. This leads to the next step of the lesson. I distributed aluminum cans of various sizes and had the students attach the yarn to the bottoms of the cans in the same way we did with the cup. The results should be obvious. The smaller cans produced a higher pitch while the larger cans produced a deeper and richer sound.
Talking Tapes
 The final activity in my lesson involved Talking Tapes. These tapes are utilized in much the same way as the yarn in my original lesson. By running their thumb along the plastic strip, students can actually make a paper or plastic cup talk! These tapes are specially molded so that, when vibrated in just the right way, they produce audible speech. And, nothing creates a “buzz” in a classroom like tapes that “talk” to the students!
The principle is the same as a diamond needle traveling through a record groove (if you remember records!). The Talking Tapes include five assorted phrases and say such things as, “Science is Fun”, “Happy New Year”, and “Be My Valentine”. Educational Innovations carries Talking Cups and a plethora of other Super! Wow! Neat! materials to teach sound in your classroom!